Blog

Setting Up Your Local Web Server on macOS Big Sur 11.0.1 (2020)| MAMP Setup on mac | macOS, Apache, MySQL, PHP

Apple released its 2020 newest macOS Big Sur on November 12, 2020. It is a time of the year again that you might need to reconfigure your macOS if you are upgrading from the macOS Catalina. Or if you have a new macOS, follow the below steps to enable your local web server on macOS Big Sur (version 11.0.1)

NOTE: For macOS 12 Monterey, please check out the How to Setup MAMP (MacOS, Apache, MySQL, PHP) on macOS12 Monterey (2021)

Table of Contents

Start the Apache Server

macOS comes with Apache Server by default. To start the built-in Apache server, open the Terminal app from your Application folder or type Terminal in the Spotlight Search (shortcut: Command + Space Bar)

Type sudo apachectl start and press enter

Open any of your favorite browser (e.g. Safari, Chrome)

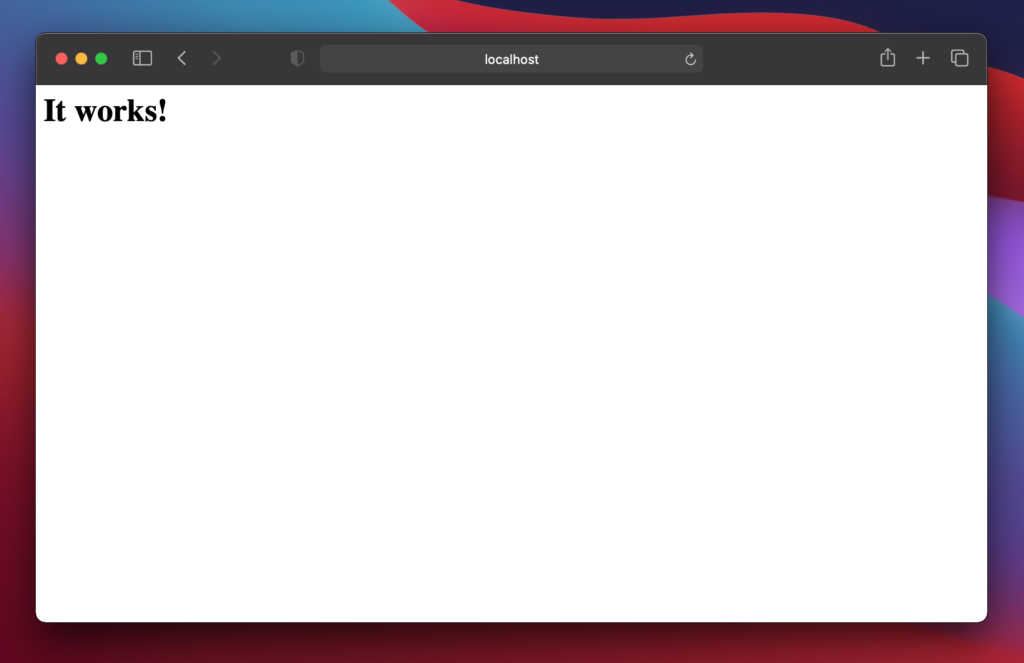
Type localhost or 127.0.0.1 in the address bar

If Apache Server is started, you should see the below:

Create Sites Directory

It is recommended to create a Sites directory under username folder (username is your mac login name) This directory will be your document root for any web-related stuff.

  1. Go to 
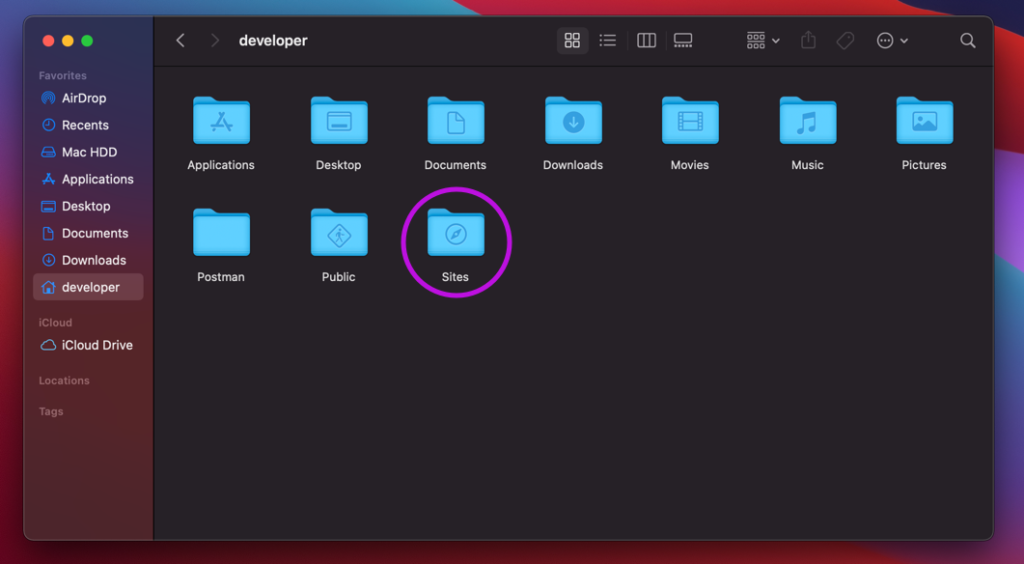
Mac HDD > Users > [your account folder]
  2. Create a folder with the name Sites. When the folder is created, it will generate a folder with a compass image on the folder as you can see from the below screenshot.

Create username.conf file

To be able to recognize the files putting into Sites directory, username.conf needed to be setup.

1. Type whoami and press enter. (Note down the name. this is your account name / username) For example, if your username is developer, we will be making a .conf file with the name of developer.conf under /etc/apache2/users

2. Type cd /etc/apache2/users and press enter.

3. Type ls and press enter. Check if there is an existing username.conf file (username is your account name)

4. If there is an existing username.conf, make a backup copy by typing sudo cp username.conf username.conf.bak

5. Type sudo nano username.conf and press enter (note: username will be your account name e.g. developer.conf)

6. Copy and paste the following configuration.

<Directory "/Users/developer/Sites/">
AllowOverride All
Options Indexes MultiViews FollowSymLinks
Require all granted
</Directory>

7. Press Control + o and press enter to save the file.

8. Press Control + x to exit the nano editor.

Configure the httpd.conf file

1. Open the Terminal app from your Application folder or type Terminal in the Spotlight Search (shortcut: Command + Space Bar)

2. Type cd /etc/apache2 and press enter.

3. Type sudo cp httpd.conf httpd.conf.bak and press enter. (This step is optional if you want to keep the copy of the original config file but I would recommend keeping one just in case.)

4. Type sudo nano /etc/apache2/httpd.conf and press enter.

5. Press control + w and type LoadModule authz_core_module and press enter. (control + w will activate the search and it will look for a line with the keyword you put in)

Uncomment the following modules. The # you see in front of each line means that line is commented out. That means that a specific line or module on that line will be ignored. What we want to do is, uncomment this so the module is enabled.

6. Use control + w to find each of the modules below.

LoadModule authn_core_module libexec/apache2/mod_authn_core.so
LoadModule authz_host_module libexec/apache2/mod_authz_host.so
LoadModule userdir_module libexec/apache2/mod_userdir.so
LoadModule include_module libexec/apache2/mod_include.so
LoadModule rewrite_module libexec/apache2/mod_rewrite.so

7. Uncomment the following line for the User home directories.

Include /private/etc/apache2/extra/httpd-userdir.conf

8. Replace the below two lines with your username document root. (You can comment on those two lines by putting # in front of them.

DocumentRoot "/Library/WebServer/Documents"
<Directory "/Library/WebServer/Documents">

9. Replace with the following:

Note: USERNAME needs be replaced with your username (e.g. developer)

DocumentRoot "/Users/USERNAME/Sites/"
<Directory "/Users/USERNAME/Sites/">

10. Press control + w and type AllowOverride None then enter

Replace AllowOverride None to AllowOverride All

Your DocumentRoot configuration in httpd.conf will look like below:

DocumentRoot "/Users/developer/Sites/"
<Directory "/Users/developer/Sites/">
    #
    # Possible values for the Options directive are "None", "All",
    # or any combination of:
    #   Indexes Includes FollowSymLinks SymLinksifOwnerMatch ExecCGI MultiViews
    #
    # Note that "MultiViews" must be named *explicitly* --- "Options All"
    # doesn't give it to you.
    #
    # The Options directive is both complicated and important.  Please see
    # http://httpd.apache.org/docs/2.4/mod/core.html#options
    # for more information.
    #
    Options FollowSymLinks Multiviews
    MultiviewsMatch Any

    #
    # AllowOverride controls what directives may be placed in .htaccess files.
    # It can be "All", "None", or any combination of the keywords:
    #   AllowOverride FileInfo AuthConfig Limit
    #
    AllowOverride All

    #
    # Controls who can get stuff from this server.
    #
    Require all granted
</Directory>

11. Press control + o and press enter to save the file.

12. Press control + x to exit the nano editor.

Configure the httpd-userdir.conf file

1. Type cd /etc/apache2/extra and press enter.

2. Type sudo cp httpd-userdir.conf httpd-userdir.conf.bak and press enter. (this step is optional if you want to keep the copy of original file.)

3. Type sudo nano httpd-userdir.conf and press enter.

Uncomment the following line.

Include /private/etc/apache2/users/*.conf

4. Press control + o and press enter to save the file.

5. Press control + x to exit the nano editor.

6. Type sudo apachectl restart (this step will restart the Apache server to take effect of the changes made in the config file)

Enable the PHP

macOS has built-in PHP (at least in Big Sur and prior versions) You just need to enable the PHP from the Apache’s config file. Follow the below steps to do so.

1. Open the Terminal app from your Application folder or type Terminal in the Spotlight Search (shortcut: Command + Space Bar)

2. Type cd /etc/apache2 and press enter.

3. Type sudo nano /etc/apache2/httpd.conf and press enter.

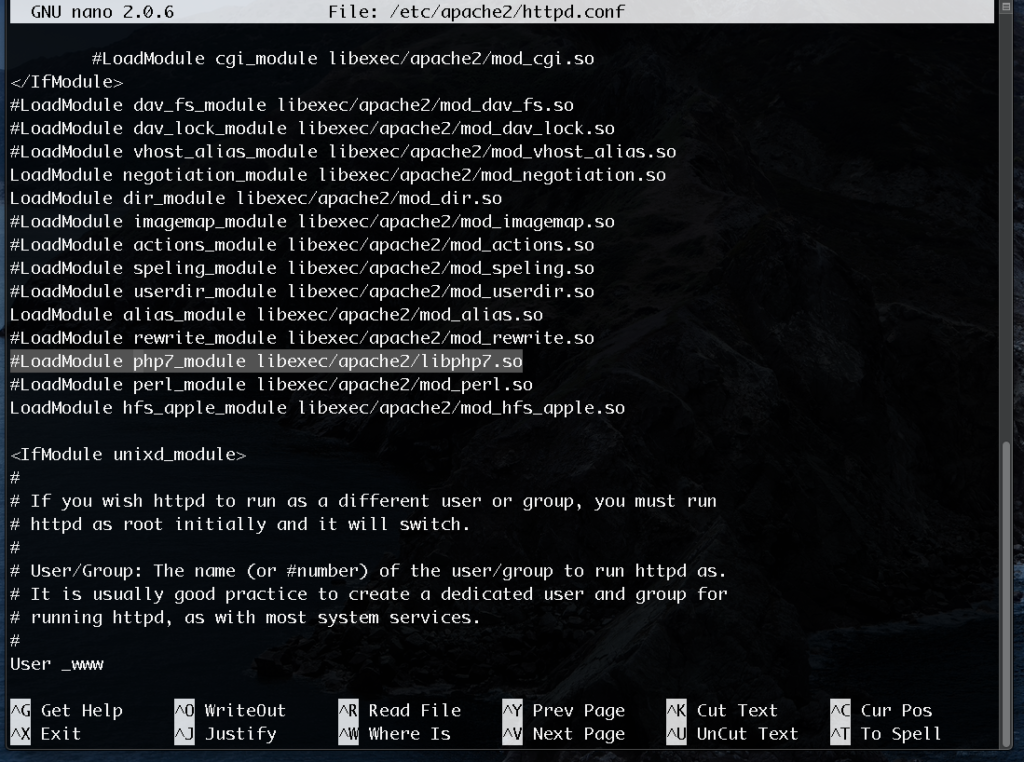
4. Press control + w and type php (this will search for a line with keyword php in Apache’s config file.)

You should be seeing the following line. Uncomment the LoadModule php7_module libexec/apache2/libphp7.so by removing the # in the front of that line of code.

5. Press control + o and press enter to save the file.

6. Press control + x to exit the nano editor.

7. Type sudo apachectl restart (this step will restart the Apache server to take effect of the changes made in the config file)

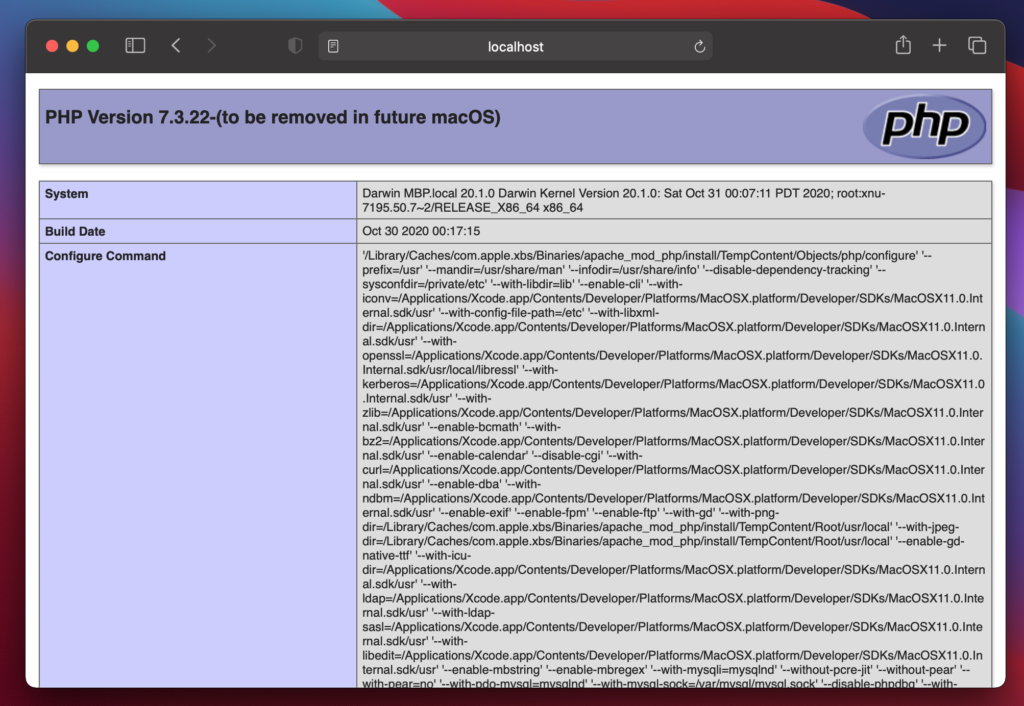
Create a phpinfo() page

To try out the PHP is working on your local mac web server, create a phpinfo() file and load it on the browser.

1. Open the Terminal app from your Application folder or type Terminal in the Spotlight Search (shortcut: Command + Space Bar)

2. Type cd ~/Sites/ and press enter.

3. Type sudo nano phpinfo.php and press enter. (this will bring up the nano editor with blank screen since the phpinfo.php is newly created file and has no code at this point)

4. Put the following code.

<?php phpinfo(); ?>

5. Press control + o and press enter to save the file.

6. Press control + x to exit the nano editor.

7. Open a browser and type the following in the address bar.

http://localhost/~developer/phpinfo.php

You should be seeing a page something like below. This means, the PHP is working on your local mac server.

Setting Up the MySQL Server

To be able to use a local database, you need to install a database server. In this case, we will be installing the MySQL Server. Follow the below steps to setup your MySQL Server on your local macOS.

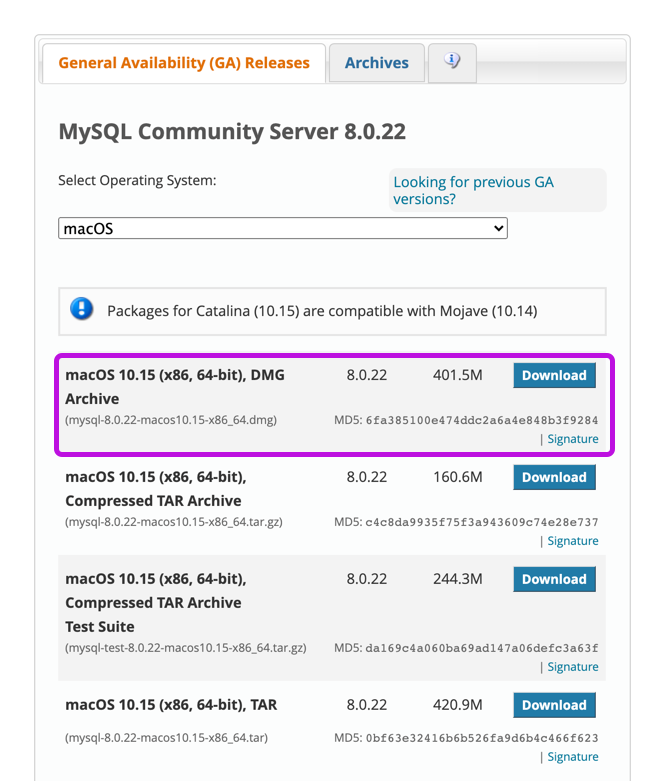
  1. Go to https://dev.mysql.com/downloads/mysql/

2. Download the installer with DMG file.

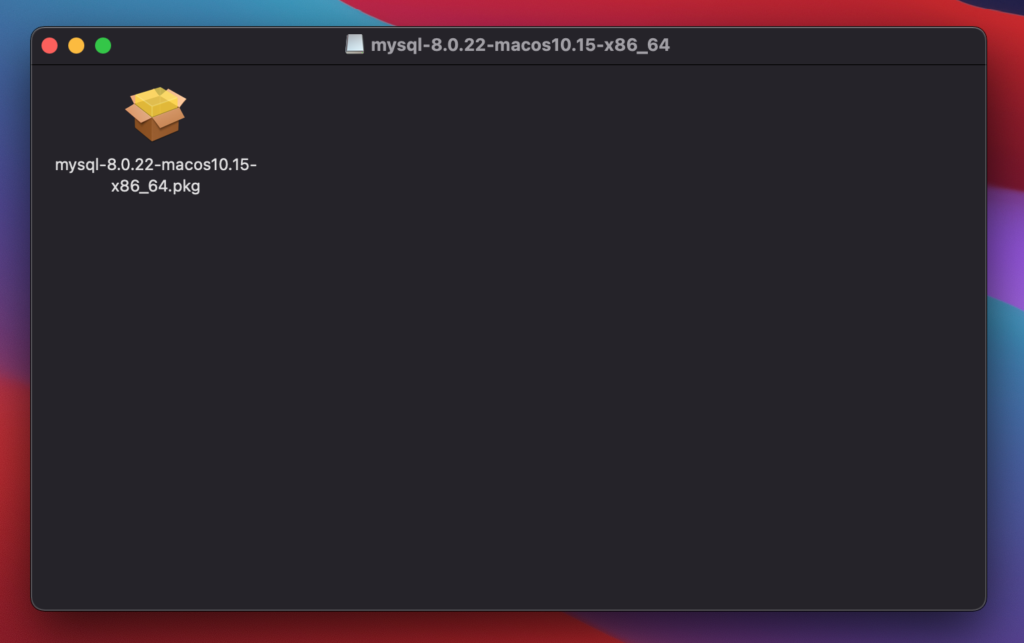
3. Double click the MySQL server installer.

Follow the instructions on the Installer.

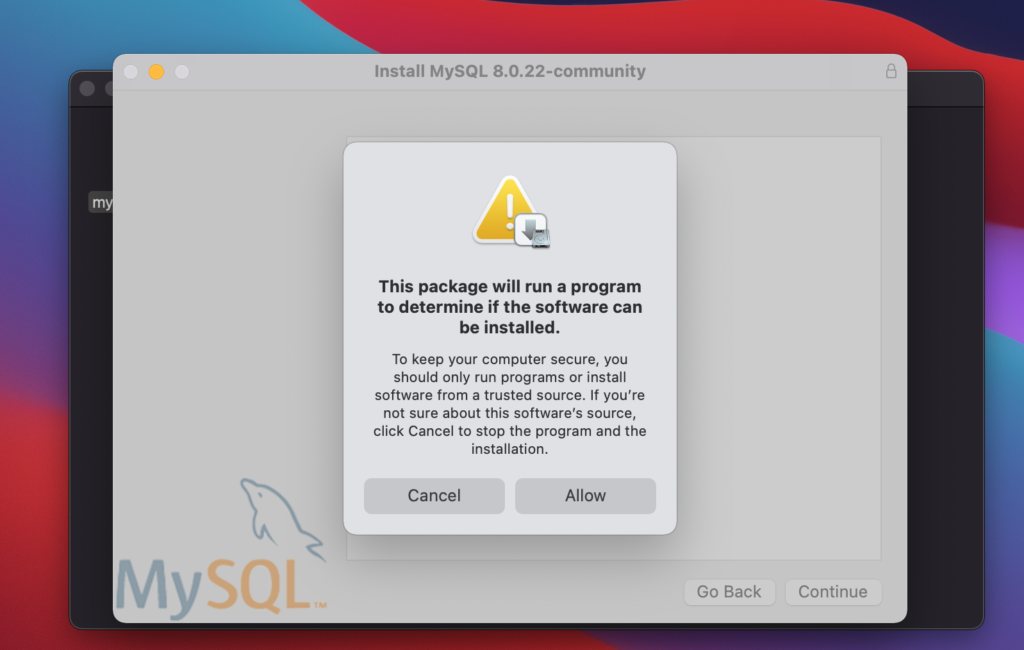
If above message shows up, click Allow.

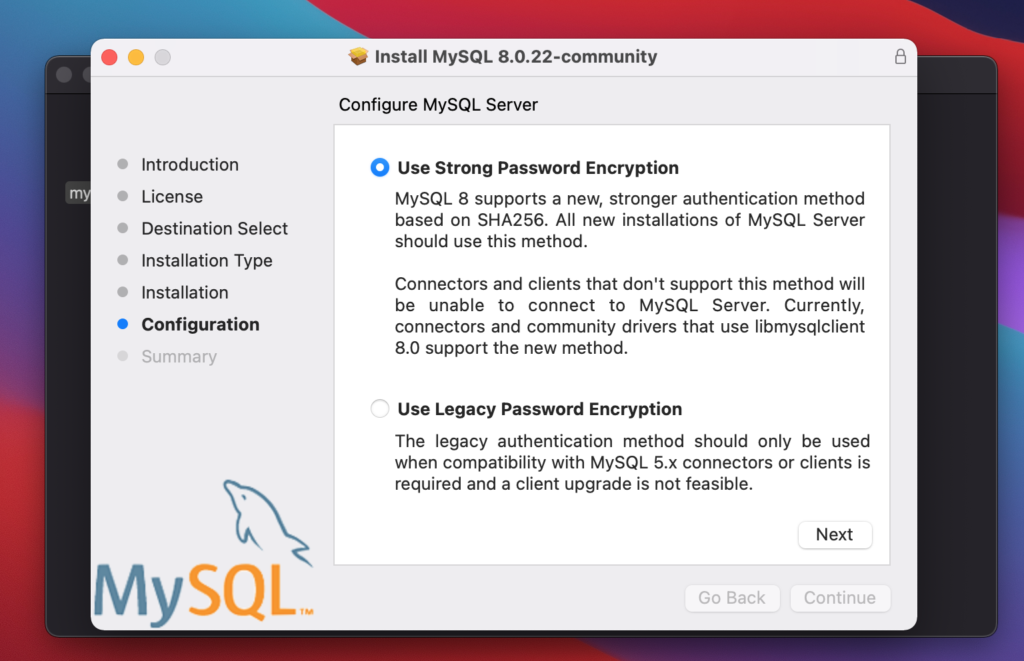
Select Use Strong Password Encryption

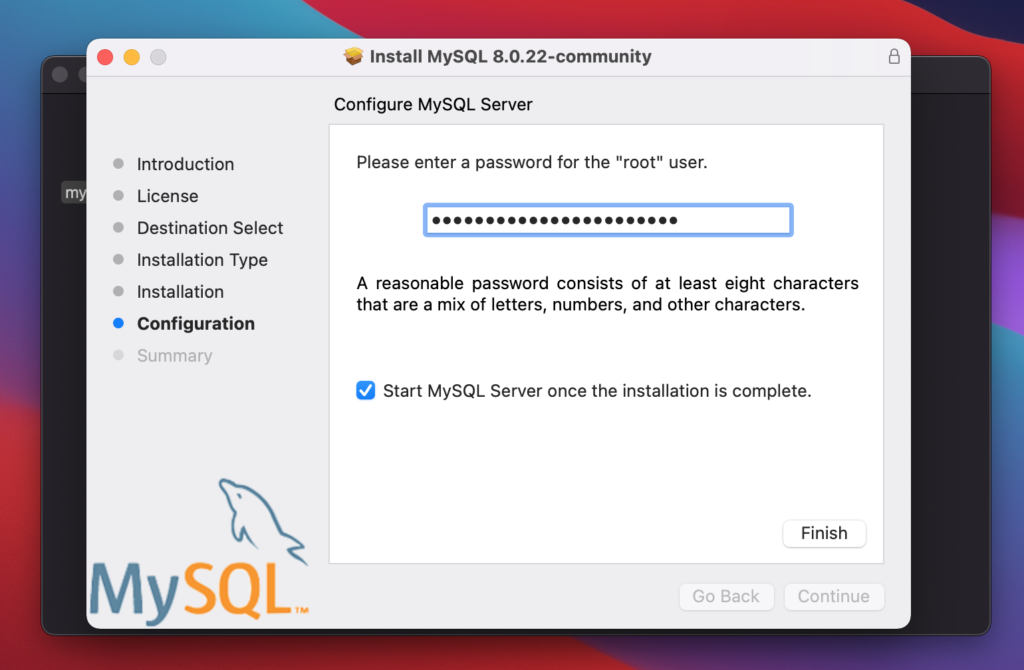
Setup a password for “root” user and click Finish to complete the setup.

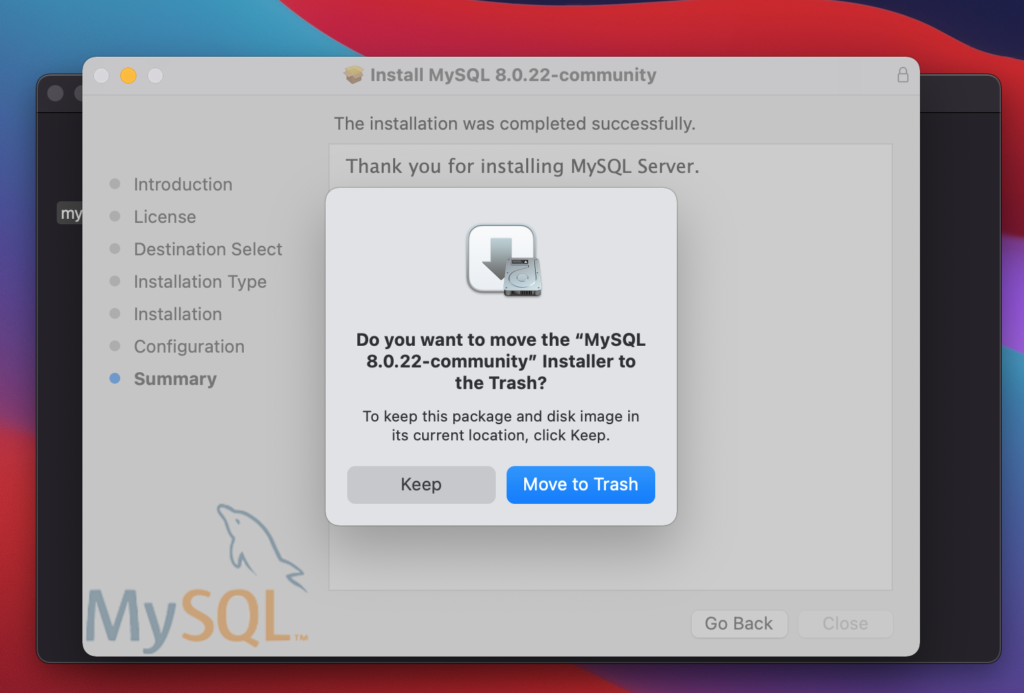
Once the installation is complete, you can move the installer to the trash.

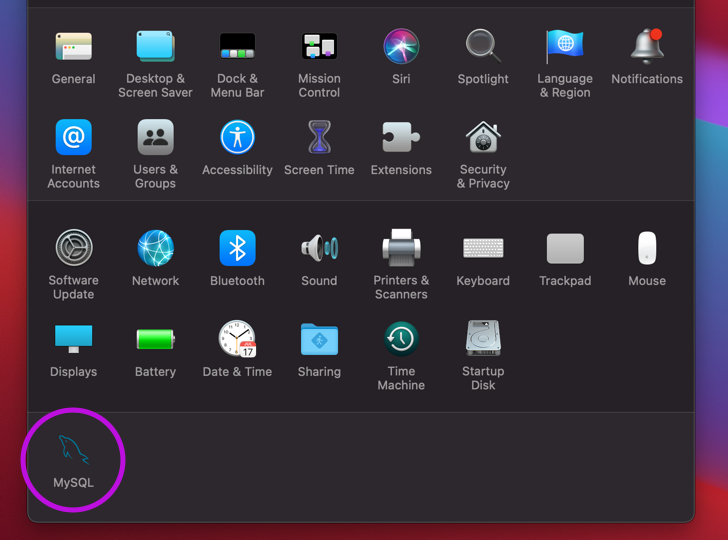
Now, if you go to System Preferences, you should be seeing MySQL.

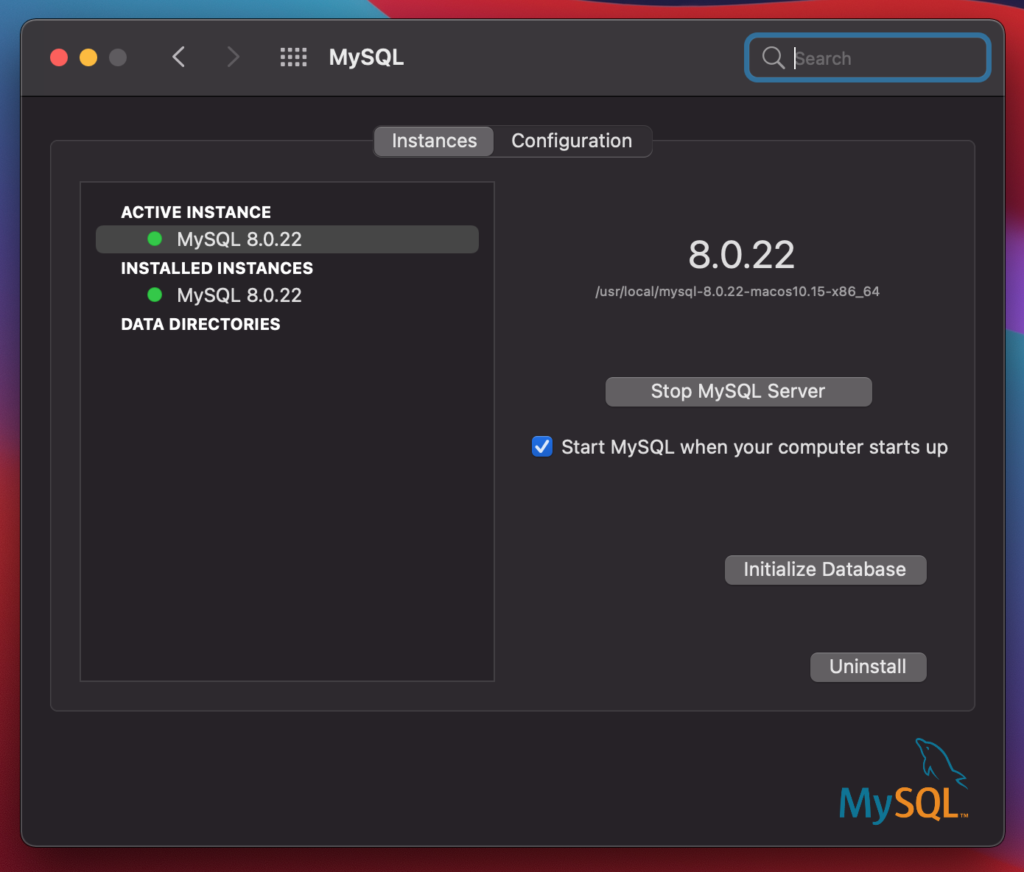
If you check, it should have the green indicator showing it is up and running.

If you need to setup a MySQL Workbench, you can refer to Using MySQL Workbench on macOS Catalina (2019)

If you are using macOS Catalina, check out Setting Up Your Local Server on macOS Catalina (2019) – MAMP – macOS, Apache, MySQL, PHP to setup your mac local web server.

Latest Post

Feel free to share this post!

What is APIPA (Automatic Private IP Addressing)?

APIPA stands for Automatic Private IP Addressing (APIPA). It is a feature or characteristic in operating systems (eg. Windows) which enables computers to self-configure an IP address and subnet mask automatically when their DHCP(Dynamic Host Configuration Protocol) server isn’t reachable. The IP address range for APIPA is (169.254.0.1 to 169.254.255.254) having 65, 534 usable IP addresses, with the subnet mask of 255.255.0.0.

History

Initially, the Internet Engineering Task Force (IETF) has reserved the IPv4 address block 169.254.0.0/16 (169.254.0.0 – 169.254.255.255) for link-local addressing. Due to the simultaneous use of IPv4 addresses of different scopes, traffic overload becomes high. The link-local addresses are allocated to interface i.e., stateless in nature such that communication will be established when not getting a response from DHCP Server. After that Microsoft refers to this address autoconfiguration method as “Automatic Private IP Addressing (APIPA)”.

Automatic Configuration and Service Checks

It starts with when the user(client) is unable to find the data/information, then uses APIPA to configure the system with an IP address automatically(ipconfig). The APIPA provides the configuration to check for the presence of a DHCP server(in every five minutes, stated by Microsoft). If APIPA detects a DHCP server on the network configuration area, it stops, and let run the DHCP server that replaces APIPA with dynamically allocated addresses.

Note: To Know the given IP address is provided by which addressing, just run the following command:

ipconfig/all

Characteristics

  • Communication can be established properly if not getting response from DHCP Server.
  • APIPA regulates the service, by which always checking response and status of the main DHCP server in a specific period of time.

Advantages

  • It can be used as a backup of DHCP because when DHCP stops working then APIPA has the ability to assign IP to the networking hosts.
  • It stops unwanted broadcasting.
  • It uses ARP(Address Resolution Protocol) to confirm the address isn’t currently in use.

Disadvantages

  • APIPA ip addresses can slow you network.
  • APIPA doesnot provide network gateway as DHCP does.

Limitations

  • APIPA addresses are restricted for use in local area network.
  • APIPA configured devices follow the peer to peer communication rule.

T-mobile instellingen modem

De instellingen voor (V)VDSL werken voor vrijwel alle DSL-verbindingen die T-Mobile aanbiedt. Werkt dit niet, probeer dan de instellingen voor ADSL. Voor glasvezelaansluitingen (Fiber via WAN/SFP) dien je het modem achter de zwarte Media Converter of witte Media Converter (ONT) aan te sluiten. Heb je momenteel een Draytek modem, dan dien je ook zelf voor een Media Converter te zorgen of een modem met glasvezelaansluiting te gebruiken. De instellingen voor het gebruik van een eigen Media Converter of ONT zie je verderop in dit artikel.
 

Eigen Media Converter aansluiten

Verberg inhoud

Om een eigen Media Converter te gebruiken (dit kan alleen bij een PtP verbinding op zowel het WBA-netwerk als ons eigen netwerk) dien je de volgende instellingen te gebruiken. Let er bij het aansluiten op dat je de glazen connector niet aanraakt. Dit kan de verbinding nadelig beïnvloeden.

Specificaties

  • Bidi optic LR (20KM)
  • TX 1310 nm, -3 ~ -9 dBm
  • RX -3 ~ -22 dBm
  • Class 1 laser product
  • Single mode Fiber (9/125)
  • SP/PC connector of SC/APC connector

Instellingen
Auto Negotiation: On
Duplex mode: Full
Flow control: Disabled
F/O mode: Auto


Alternatieve setting
Auto Negotiation: Off
Manual TP speed: 1000M
Duplex mode: Full
Flow control: Disabled
F/O mode: Auto

Eigen ONT (Optical Network Terminal) aansluiten 

Verberg inhoud

Om een eigen ONT te gebruiken, dien je een ONT te nemen die geschikt is voor het gebruik op je netwerk. We raden het gebruik van een eigen ONT af, omdat we bij het omwisselen enkele dagen nodig kunnen hebben om de door ons geleverde ONT weer te registreren. Als je begrijpt wat de risico’s hiervan zijn, kan je via onze klantenservice een verzoek indienen om je eigen ONT te registreren. Binnen enkele dagen zal de ODIDO ONT de verbinding verliezen. Vanaf dat moment kan je je eigen ONT aansluiten. Let er bij het aansluiten op dat je de glazen connector niet aanraakt. Dit kan de verbinding nadelig beïnvloeden.

Op een KPN WBA glasvezelverbinding is een eigen ONT alleen mogelijk wanneer je met XGSPON verbonden bent. Mogelijk moet je lijn gemigreerd worden voordat je een eigen XGSPON ONT kan aansluiten.

Op ons eigen netwerk (GPON of XGSPON) kan je, afhankelijk van de verbinding, een GPON ONT gebruiken of een XGSPON ONT gebruiken.

VoIP (Vast Bellen)

Verberg inhoud

  • SIP Username: Kan klant vinden in My T-Mobile Thuis 
  • SIP Password: Dit moet klant zelf instellen in My T-Mobile thuis 
  • SIP Proxy Server Address: voip.t-mobilethuis.nl 
  • Primair compressie type: G.711a 
  • Secundair compressie type: G.722 
  • Tertiair compressie type: G.711u 
  • Bediening van spreek volume: Middle 
  • Luister volume regelaar: Middle 
  • G.168 (Echo-annulering): inschakelen 
  • RTP Start – eind poort:  40000 – 40018 
  • DTMF-modus: PCM 
  • Transport Type: UDP 
  • SIP DSCP Markeringinstelling: 46 
  • RTP DSCP Markeringinstelling: 46 
  • Vervaltermijn van SIP-registratie: 3600 seconden 
  • Mislukte timer voor opnieuw proberen van SIP-registratie: 1800 
  • Sessie verloopt (SE): 900 
  • Min-SE : 600 

IPTV (tv-kijken)

Verberg inhoud

Deze instellingen zijn enkel nodig wanneer je op het oude TV platform zit (Interactieve TV). Op het nieuwere platform T-Mobile TV gaat het tv-signaal over het internet VLAN en is er ook geen routing nodig. 

WAN (V)VDSL ETHWAN ADSL 
VPI/VCI   8/71 
Mode Routing Routing Routing 
Encapsulation IPoE IPoE IPoE 
IPv4/IPv6 Mode IPv4 IPv4 IPv4 
VLAN Enable 802.1p: 0 802.1q: 640 Enable 802.1p: 0 802.1q: 640 Disable 
MTU 1500 1500 1500 
NAT 
IGMP Proxy 

Static Route: 

Rule Name Destination IP Subnet mask WAN Interface 
IPTV_SR01 10.12.255.0 255.255.255.0 IPTV Sub interface 
IPTV_SR02 10.10.254.0 255.255.255.0 IPTV Sub interface 
IPTV_SR03 10.10.26.0 255.255.255.0 IPTV Sub interface 
IPTV_SR04 10.10.108.0 255.255.255.0 IPTV Sub interface 
IPTV_SR05 10.18.0.0 255.255.240.0 IPTV Sub interface 
IPTV_SR06 10.12.254.0 255.255.255.0 IPTV Sub interface 
IPTV_SR07 10.10.24.0 255.255.255.192 IPTV Sub interface 
IPTV_SR08 10.200.0.0 255.255.252.0 IPTV Sub interface 
IPTV_SR09 10.12.200.65 255.255.255.255 IPTV Sub interface 

IGMP Proxy: Enabled 

IGMP Mode: Blocking Mode 

IGMP version: 2 

Notes tips en tricks

check jumbo-frames on Juniper switch :

ping 192.168.1.1 no-resolve routing-instance ri-main do-not-fragment size 9170

Learn to Use CURL Command in Linux With These Examples

Page Contents

What is CURL ?

CURL is a tool for data transfer. It is also available as a library for developers and as a CLI for terminal-based use cases. Both have the same engine inside (Truth is that CLI tool is just the program that uses the library under the hood).

CURL works with every protocol you might have used. Head over this site to check whether CURL works with your target protocol or not.

What CURL can do?

Hmm… Everything that is related to data transfer. Everyone must have used a browser. Even now, you are reading this article through your browser. What browser does, it requests a page and gets it as a response. It can write and read cookies. And then it renders(displaying the content, images and executing JS scripts) it. 

CURL can do everything a browser except for the last part rendering because it is not related to data transfer.

As wrap up, CURL can download HTML pages, fill HTML forms and submit them, download files from a FTP/HTTP server and upload files to the same and read/write cookies.

This makes it an excellent tool to be used in scripting, debugging and forensic analysis etc.

Curl command examples

curl command examples in Linux

Let’s see what can you do with Curl.

1. Get a response from a server

Everything from server is a response to the request. So getting a HTML page is same as downloading a file.

To get a HTML response from http://info.cern.c,

curl http://info.cern.ch/

To get the list of posts as a response from a server ( https://jsonplaceholder.typicode.com/posts), 

curl https://jsonplaceholder.typicode.com/posts

Since we know how to get a response from a server, you can download a file ( say Google logo ).

curl https://www.google.com/images/branding/googlelogo/1x/googlelogo_color_272x92dp.png

Above command will dump binary image data which you can’t view in the terminal. You need to save them and then use a photo viewer to see them.  Continue reading to find out how to do so.
READ  9 Useful Examples of Touch Command in Linux

Note that various option flags can be placed anywhere on the command instead of the strict ordering. So no worry if you placed any option in the last while the examples had the flag in the beginning.

2. Save the file with a default file name

Every file that is served on the internet has a filename. To use the same filename as the downloaded filename use -O flag.

curl -O http://www.google.com/robots.txt

3. Save the file with custom name

To save the filename with your own custom name, use -o flag followed (strictly) by a custom name.

curl -O http://www.google.com/robots.txt googleRobots.txt

4. Download multiple files

To download multiple files, separate them with a white space.

curl url1 url2 url3

If you want to use -O flag for all the URL’s, use

curl url1 url2 url3 -O -O -O 

The same workaround should be done for any flag. This is because the first occurrence of a certain flag is for the first URL, the second flag is for the second URL and so on.

5. Download a range of files

curl has the in-built ability to download a range of files from the server. This can be illustrated from the following example.

curl http://www.google.com/logo/logo[1-9].png

Above command downloads files from logo1.png, logo2.png, logo3.png and up to logo9.png.

6. Download a file only if latest

To download a file only if the file’s modification time is latest than the given time.

curl url -z "DD MMM YY MM:HH:SS"

7. Resume Downloading

If you have already partially transferred a file, you can resume the transfer by using the -C flag. Offset from which transfer needs to be continued should be passed as a parameter to the -C flag.

curl -C 1024 http://seeni.linuxhandbook.org/files/largeFile.mpv -O

8. Upload a file

To upload a file to the server, one needs to use -T flag followed by the file path on your local system.

curl -T uploadFile.txt http://upload.linuxhandbook.org/files

9. Delete a file

To delete a file named deleteFile.txt in a server, one can use -X flag which is intended for any HTTP verb/method(like GET, POST, PUT, DELETE, PATCH). Most of the FTP servers will have configured DELETE method if not all advanced HTTP methods.

curl -X DELETE http://upload.linuxhandbook.org/files/deleteFile.txt

You can also modify the above command for any HTTP method to do the corresponding task. For Example, if your server allows TRUNCATE method ( this is made-up HTTP method, not a standard one) which removes only the content in the file and not the file, one can use the command similar to the below one.

curl -X  TRUNCATE http://upload.linuxhandbook.org/files/mysql.dump

Above mentioned are the main uses of curl. But there might be difficulties which needed to be fought such as redirects, user authentication, SSL certificates, etc., We can call them add-ons as they are only optional but still remain crucial for certain purposes. Let’s see some of those addons and how to handle it with curl in the next section.READ  5 Practical Examples of chgrp command in Linux

10. Avoid redirects

When you request htttp://www.google.com , you will be served only the regional page such as www.google.co.in. This is done with the help of redirects (HTTP packets with status codes in the range 300-399).

You can avoid redirects with the option L.

curl -L  htttp://www.google.com

11. Authentication

When the server is configured to serve for only certain individuals with credentials, they will be provided with username and password. One can make login with the help of -u flag.

curl -u username:password http://seeni.linuxhandbook.org/files/tasks.txt

12. Limit data transfer

If you want to impose a data transfer limit use –limit-rate flag. Following command tries to download the file with rate limit as 10K.

curl --limit-rate 10K http://seeni.linuxhandbook.org/files/logoDetails.tgz

13. Show/Hide transfer Status

If the response is redirected from the terminal such as downloading, uploading then curl automatically shows the status/progress meter for the transfer.

If you do not want to see the progress meter, just append the command with -s flag. Progress will not be shown for response directed for the terminal.

14. Ignore SSL certificates

Do you remember the situations in which you need to give security certificate exception to visit some websites? If you trust the sources and you want to do a data transfer, you can ignore SSL certificate validation by using -k flag.

curl -k https://notSoSecure.org/files/logoDetails.tgz

15. Get Header Information also

To display the header information along with transferred data, use the -i flag.

curl -i http://www.google.com/robots.txt

16. Get Header information Only

If you want only the headers and not the data, use the -I flag

curl -I http://www.google.com/robots.txt

17. Change User Agent

Some websites and servers don’t allow certain kinds of devices to access their systems. But how do they know that we are using a specific kind of device? This is due to the User-Agent HTTP header field. We can change this User Agent with -A flag.

curl -A "Mozilla FireFox(42.0)" http://notAllowedForCLI.sites.org/randomFile.png

18. Sending data to the Server

If the server needs some data such as token or API key, use -d flag to send the data. Data that needs to be sent should follow the flag in the command. One can use “&” to combine multiple data. This is usually done by GET and POST requests in browsers. This is one of the ways by which you can send your form information.

curl -d "token=34343abvfgh&name='seeni'" http://api.restful.org/getcontent

19. Write Cookies to a File

Cookies are some small information that allows maintaining a session with a stateless HTTP protocol. If you want to know more about Cookies, refer to this great resource.READ  10 Practical Grep Command Examples for Developers

To write cookies to a file, -c flag followed by the cookie filename should be used.

curl -c googleCookie.txt http://www.google.com/files

20. Reading Cookies from a File

To read a cookie from the file, -b flag followed by cookie filename can be used.

curl -b googleCookie.txt http://www.google.com/files

Note that -b flag only reads the cookie from the file. So if the server resends another cookie, you might need to use -c option to write them.

21. Start a new Session

If you want to initiate a new session by discarding the cookies, use -j flag. It starts a new session even if you have provided the cookie file to read with -b flag.

curl -b googleCookie.txt http://www.google.com/files -

C

Centos Install Server

Omdat CentOS nu eenmaal één van mijn favoriete server-besturingssystemen is, gaan we uit van een installatieserver met CentOS. Dat maakt overigens voor het principe niet heel veel uit, want een installatieserver maakt gebruik van dezelfde componenten, welke distributie je ook gebruikt. De server die momenteel voor me aan het werk is, staat gelijktijdig zowel OpenSUSE als CentOS te installeren. Met een goed ingerichte server installeer je dus moeiteloos elke distributie.


Componenten

Een volledig geautomatiseerde installatieomgeving heeft een aantal dingen nodig. We gaan ervan uit dat je wilt opstarten vanaf het netwerk. Om dit succesvol te laten verlopen, heb je een DHCP-server nodig die IP-adressen uitdeelt aan de te installeren machines. De volgende stap bestaat eruit dat die machines ook een boot image nodig hebben. Hiervoor wordt gebruik gemaakt van een TFTP-server. De DHCP-server zorgt ervoor dat de client doorgestuurd wordt naar de TFTP-server, zodat daar de juiste bestanden aangeleverd worden om van op te starten.

Om op te kunnen starten, heeft een Linux-client 3 bestanden nodig: een boot loader, een kernel en een initramfs. De boot loader vervangt de lokale boot loader (meestal GRUB) en geeft aan welke kernel gestart moet worden. Die kernel laadt vervolgens het initramfs. Daarbij wordt ook aangegeven waarvandaan de rest van de installatie uitgevoerd moet worden. Voor dat laatste deel is een repository nodig. Om een flexibele installatieserver aan te bieden waarop je zelf bepaalt welke packages precies aangeboden worden, is het aan te raden zelf de repositories aan te bieden (en deze niet van internet te halen). Je kan daarvoor in principe elke service gebruiken, in dit artikel laten we zien hoe je voor dit doel een webserver in kan zetten.

Als je alles tot op dit punt werkend hebt, heb je een omgeving waar de te installeren servers op kunnen booten, een boot image krijgen, en vervolgens ook toegang krijgen tot een repository om de installatie verder uit te voeren. Als het hierbij blijft, moet die installatie echter nog wel steeds handmatig uitgevoerd worden. Leuk als je één of twee servers wilt installeren, minder leuk als je er 200 wilt installeren. Om dit gedeelte ook nog te automatiseren, heb je een installatiescript nodig.

Er zijn verschillende oplossingen voorhanden: SUSE gebruikt autoyast, Red Hat gebruikt Kickstart en ook op Ubuntu kun je Kickstart gebruiken. Zowel Kickstart als Autoyast gebruiken input files waarin alle parameters gedefinieerd zijn die tijdens de installatie gebruikt moeten worden. Dit script plaats je op de installatieserver, zodat het ook eenvoudig aangeroepen kan worden. Bij het aanroepen van de installatie-kernel geef je aan welk script gebruikt moet worden en daarmee maak je de procedure compleet. In de rest van dit artikel zullen we de belangrijkste delen van de configuratie bekijken die nodig zijn om dit allemaal te realiseren.


De DHCP-server

De DHCP-server heeft op zich niet veel configuratie nodig. In listing 1 zie je een voorbeeldconfiguratie, waarin de regel next-server ervoor zorgt dat DHCP de client doorstuurt naar een TFTP-server op dit adres. De filename pxelinux.0 is de PXE-boot loader die aan de client gestuurd wordt.


Listing 1: Voorbeeld DHCP-server configuratie


subnet 192.168.178.0 netmask 255.255.255.0 {

option routers 192.168.178.1 ;

range 192.168.178.200 192.168.178.250 ;

next-server 192.168.178.110;

filename “pxelinux/pxelinux.0”;

}


De TFTP-server

TFTP is al heel lang een onderdeel van xinetd. Om TFTP te kunnen gebruiken, zet je het aan in xinetd en zorg je dat de xinetd service gestart is. Daarbij hoort een configuratiebestand waarin je het PXE-menu zet. Deze vind je standaard in /var/lib/tftptboot/pxelinux/pxelinux.cfg en heeft de naam default. Listing 2 laat een voorbeeld PXE menu zien waaruit verschillende configuraties aangeboden kunnen worden.


Listing 2: Voorbeeld PXE boot menu


default Linux

prompt 10

timeout 10

display boot.msg

label Linux

menu label ^Install RHEL

menu default

kernel vmlinuz

append initrd=initrd.img inst.repo=http://192.168.178.110/install ks=http://192.168.178.110/anaconda-ks.cfg

label Fedora

menu label Install ^Fedora Server

kernel vmlinuz-fedora

append initrd=initrd-fedora inst.repo=http://192.168.178.110/fedora ks=http://192.168.178.110/fedora-ks.cfg

label Fedoraws

menu label Install Fedora ^Workstation

kernel vmlinuz-fedoraws

append initrd=initrd-fedoraws inst.repo=http://192.168.178.110/fedoraws

label opensuse

menu label install opensuse

kernel vmlinuz-suse

append initrd=initrd-suse install=http://192.168.178.110/opensuse


Als je ooit een GRUB-menu gezien hebt, zie je dat een PXE boot-menu daar niet wezenlijk van verschilt. Het komt erop neer dat je voor elke distributie een kernel neerzet in de TFTP document root, daarnaast een initramfs en tot slot aanwijst welke repository gebruikt moet worden om de rest van de installatie uit te voeren. Je hebt dan in principe voldoende om de installatie op te starten en handmatig verder uit te voeren.


De Webserver

Het aanmaken van de repositories is overigens niet heel ingewikkeld. Een handige manier is om de ISO van de betreffende distributie te downloaden en via /etc/fstab te loop-mounten op de locatie waar de installatiebestanden beschikbaar moeten zijn. Handig, want je hoeft niets te kopiëren en het is eenvoudig te regelen als een nieuwe versie van je distributie beschikbaar komt.

Als je er dan ook nog voor zorgt dat die locatie beschikbaar is onder de documentroot van je webserver, hoef je helemaal niet veel meer te doen dan de webserver aan te zetten om te regelen dat repositories automatisch beschikbaar gesteld worden.


De installatie-instructies

Het laatste element van de installatie server bestaat uit de installatie instructies. Autoyast is de oplossing die door SUSE gebruikt wordt. Daarnaast is er Kickstart. De installatie-instructies worden aangeleverd in een kort tekstbestand waarin de antwoorden staan op de vragen die tijdens de installatie gesteld worden. Kickstart doet dat in een ASCII-tekstbestand, Autoyast doet het in een XML-bestand. In listing 3 zie je een voorbeeld van hoe dat eruitziet in een Kickstart bestand.


Listing 3: Voorbeeld Kickstart bestand


[root@server html]# cat anaconda-ks.cfg

#version=RHEL7

# System authorization information

auth –enableshadow –passalgo=sha512


# Use network installation

url –url=”http://192.168.178.110/install”

# Run the Setup Agent on first boot

firstboot –enable

ignoredisk –only-use=sda

# Keyboard layouts

keyboard –vckeymap=us –xlayouts=’us’

# System language

lang en_US.UTF-8


# Network information

network  –bootproto=dhcp –device=p6p1 –ipv6=auto –activate

network  –hostname=localhost.localdomain

# Root password

rootpw –iscrypted $6$GUg.iLUId16gnydz$AHsdHvpPof2KmIYQH2nlF8H.lFFf9DM/J5tC91HsvZYvKpGSeTRo0oE9B8aR1KaZ5u5YK1NwXBOUhv1ZkbZVY.

# System timezone

timezone America/New_York –isUtc

user –name=user –password=$6$yMRAMUievKP2EYT5$JmwC3j.jo9ySsuo6ogUNsI.5sQvW51SgtCLtlGDD/6/dLlz.XLj2dvTXVbfTaeDSLKPfgEDkVqxvbstjpYZt9. –iscrypted –gecos=”user”

# X Window System configuration information

xconfig  –startxonboot

# System bootloader configuration

bootloader –location=mbr –boot-drive=sda

# Partition clearing information

clearpart –drives=sda –all

# Disk partitioning information

part /boot –fstype=”xfs” –ondisk=sda –size=1000

part pv.11 –fstype=”lvmpv” –ondisk=sda –size=31008

volgroup centos –pesize=4096 pv.11

logvol /  –fstype=”xfs” –size=30000 –name=root –vgname=centos

logvol swap  –fstype=”swap” –size=1000 –name=swap –vgname=centos


%packages

@base

@core

@desktop-debugging

@dial-up

@fonts

@gnome-desktop

@guest-agents

@guest-desktop-agents

@input-methods

@internet-browser

@multimedia

@print-client

@virtualization-hypervisor

@virtualization-client

@virtualization-platform

@virtualization-tools

@x11

wget

%end


%post

mkdir /files

logger now running post

wget http://192.168.178.110/downloads/CentOS-7-x86_64-DVD-1611.iso -O /files/centos73.iso

wget http://192.168.178.110/downloads/labipa-3.0.3.zip -O /files/labipa-3.0.3.zip

wget http://192.168.178.110/downloads/how-to-use-labipa.pdf -O /files/how-to-use-labipa.pdf


%end


De enige uitdaging is hoe je aan zo’n bestand komt. Welnu, dat is niet moeilijk. Na installatie van een Red Hat of Fedora systeem wordt het standaard aangemaakt in de home directory van de gebruiker root en op SUSE kan je het vanuit Yast genereren met behulp van de autoyast module. Het enige dat dan nog rest, is in het PXE-boot bestand aan te geven waar de te installeren server dit bestand kan vinden en je installatieserver is klaar voor gebruik.

BIOS and UEFI explained, all you need to know about.

BIOS and UEFI are two of a kind, but completely different from each other. They serve one major purpose: booting the machine and they do it in different ways and with different options. Without them, all your hardware and the very machine you’re reading this article on, wouldn’t even start. But what are the differences? And why are they mutually exclusive?

What is BIOS?

The Basic Input Output System is the older standard and dates back to old IBM-compatible computers. For almost twenty years, the BIOS has been a de facto standard in common computer implementations. The BIOS is a special software called firmware that is stored in a special chip soldered on the motherboard called ROM (usually EEPROM these days). When you press the power button, the BIOS is the first software that is run on the machine. This software is mostly responsible for three things:

  1. Performing POST: (Power-On Self-Test) in this phase the BIOS checks if the component installed on the motherboard are functioning (mostly CPUs and RAMs).
  2. Providing Basic IO: so that essential peripherals such as the keyboard, the monitor and serial ports can operate to perform basic tasks.
  3. Booting: this step is where all the magic happens, the BIOS tries to boot from the devices connected (SSDs, HDDs, PXE, whatever) in order to provide a better-suited interface (usually an Operating System) to fully make use of the hardware components.

As you can see the BIOS is pretty much a fundamental brick of the boot process and without it you wouldn’t be able to “start” the computer. A BIOS is usually associated with the motherboard and is mostly visible during the first seconds after powering the computer. When you see a great logo from the motherboard/computer manufacturer and (usually) hear beeps, the BIOS is at work.

What the BIOS can and can’t do

BIOS perform quite a strict role and it might appear to you that they always do the same thing. In the past, BIOS were written on plain ROMs (or difficult-to-erase ROMs), without the possibility to write or to erase the ROM, the software couldn’t be programmed or upgraded. Nowadays, BIOS can be updated to support newer hardware/features and can be programmed to perform specific tasks such as:

  • Turning on/off USB portsSerial ports or IDE/SATA ports;
  • Over/Underclocking CPUs/RAMs frequencies;
  • Regulate motherboard fan controllers;

Although BIOS can perform these task well, they still operate in the 16-bit realm and as such they are limited. The most prominent limitation can be observed when using 2TB+ disks. Most BIOS can only boot from an MBR-partitioned disks, but MBR itself supports up to 2TB partitions meaning it won’t recognize the disk past that. Well there’s GPT that solves the problem of disks bigger than 2TB, but wait… most BIOS can’t boot from GPT. This means that if you have a 3TB disk you have two choices:

  • Use MBR partitioning: you will be able to boot an Operating System but the system will be presented with 2TB only.
  • Use GPT partitioning: you will not be able to boot.

The choice is obvious. But how can a disk larger than 2TB be used as a boot disk?

UEFI the BIOS successor

The Unified Extensible Firmware Interface aims to resolve what BIOS could not. UEFI itself is the second version (2.*), the former being EFI (1.*). If you bought a computer after 2010, you will probably have a UEFI instead of a BIOS. You read correctly, BIOS and UEFI do the same thing, but they are pretty different in how and what they do. A UEFI can (in addition to what a BIOS can):

  • Boot from disks larger than 2TB using GPT (assuming the operating system supports both).
  • Provide the user with a graphical user interface which is easier to use than old terminal user interfaces of BIOS.
  • Provide support for mouse devices (BIOS can rarely do this).
  • Boot securely using a chain-of-trust. (More later on secure boot).
  • Network boot (although most BIOS can do that, that’s not a given).
  • Provide a modular interface which is independent from the CPU architecture.
  • Provide a modular interface for applications and devices based on EFI drivers (commonly called EBCsEFI Byte-Code).

Do I have a BIOS or a UEFI?

Unless you read your motherboard’s manual, there is no precise way to tell if you’re using a BIOS or a UEFI. But there are a few signs:

  • UEFIs usually have pretty, coloured interfaces.
  • In UEFI you can usually use your mouse.
  • If you bought the computer/motherboard after 2010, chances are you have a UEFI system.

UEFI and boot modes

With the inception of UEFI a new boot mode was born, leaving us with two modes:

  • UEFI mode: the newer boot mode, requires a separate partition (called EFI partition) where bootloaders are stored.
  • BIOS mode: the old way used by the BIOS, the bootloader would be stored on the disks (usually at the beginning of the disk).

This created a lot of confusion, especially among tech enthusiasts. Before UEFI the only way to install an operating system was the BIOS mode, but with UEFI, the UEFI mode was the new standard and the selected default. This, however, messed with Operating Systems: Operating System installed in BIOS mode can’t be booted using UEFI mode and vice versa. This means that if you have installed an operating system in BIOS mode you can’t boot in UEFI mode without modifying the installation or reinstalling the whole system, the same applies with a UEFI installation and a BIOS boot. That’s why many UEFI now support the so-called Legacy Mode.

UEFI and Legacy Mode

Put it simply, the Legacy Mode is UEFI operating as if it was a BIOS. You will lose most of the benefits the UEFI such as the Secure Boot or the Fast Boot, but will retain the graphical user interface. The only difference is that the UEFI will be able to boot from MBR disks (hence without the required EFI partition) and will be able to boot non-UEFI installations. Most motherboards support Legacy Mode nowadays.

I have a UEFI, was my operating system installed in UEFI or Legacy mode?

This can be determined using the Operating system capabilities:

  • Windows: Use the Disk Management tool to check if a “EFI System Partition” exists on the disk where Windows is. If there is one, the system was installed in UEFI mode, if not it was installed in Legacy mode.
  • Linux: check if /sys/firmware/efi exists, if it does the system is installed in UEFI mode.

UEFI and Secure Boot

One of the most discussed features is the so-called Secure Boot (sometimes called Trusted Boot), the secure boot was born to ensure a more secure boot than the past. By denying the execution of unsigned code, Secure Boot enforces protection against malwares that operate in the pre-bootenvironment. This feature, however, had a negative effect on Linux users and vendors. To be able to boot an operating system, the same (more precisely the bootloader) had to be signed by a known key, which had to be recognized by the UEFI. When the first UEFI implementations started shipping it became clear that most Linux vendors weren’t prepared for this inception. Only a few vendors (namely Canonical, SUSE and Red Hat) could sign their operating system to work with Secure Boot. For a short time before UEFI, a fear that hardware vendors tied to Microsoft would enforce Secure Boot without the possibility to turn it off started spreading. Nowadays most UEFIs (albeit not every one) allow turning off Secure Boot. This enables a less-secure boot but allows unsigned operating systems to be booted.

Fast Boot? Quick Boot? Ultra Fast Boot?

All these names are vendor-specific ways to say “boot Windows faster“. These technologies use cache and hibernation files in order to produce a faster boot. This is usually so fast that the user won’t even see the POST screen or be able to boot from USB. Fast boot is a mechanism supported by Windows only.

Tips & tricks : Iptables provides powerful capabilities to control traffic coming in and out of your system.

Modern Linux kernels come with a packet-filtering framework named Netfilter. Netfilter enables you to allow, drop, and modify traffic coming in and going out of a system. The iptables userspace command-line tool builds upon this functionality to provide a powerful firewall, which you can configure by adding rules to form a firewall policy. iptables can be very daunting with its rich set of capabilities and baroque command syntax. Let’s explore some of them and develop a set of iptables tips and tricks for many situations a system administrator might encounter.

Avoid locking yourself out

Scenario: You are going to make changes to the iptables policy rules on your company’s primary server. You want to avoid locking yourself—and potentially everybody else—out. (This costs time and money and causes your phone to ring off the wall.)

Tip #1: Take a backup of your iptables configuration before you start working on it.

Back up your configuration with the command:

/sbin/iptables-save > /root/iptables-works

Tip #2: Even better, include a timestamp in the filename.

Add the timestamp with the command:

/sbin/iptables-save > /root/iptables-works-`date +%F`

You get a file with a name like:

/root/iptables-works-2018-09-11

If you do something that prevents your system from working, you can quickly restore it:

/sbin/iptables-restore < /root/iptables-works-2018-09-11
ln –s /root/iptables-works-`date +%F` /root/iptables-works-latest

Tip #4: Put specific rules at the top of the policy and generic rules at the bottom.

Avoid generic rules like this at the top of the policy rules:

iptables -A INPUT -p tcp --dport 22 -j DROP

The more criteria you specify in the rule, the less chance you will have of locking yourself out. Instead of the very generic rule above, use something like this:

iptables -A INPUT -p tcp --dport 22 –s 10.0.0.0/8 –d 192.168.100.101 -j DROP

This rule appends (-A) to the INPUT chain a rule that will DROP any packets originating from the CIDR block 10.0.0.0/8 on TCP (-p tcp) port 22 (–dport 22) destined for IP address 192.168.100.101 (-d 192.168.100.101).

There are plenty of ways you can be more specific. For example, using -i eth0 will limit the processing to a single NIC in your server. This way, the filtering actions will not apply the rule to eth1.

Tip #5: Whitelist your IP address at the top of your policy rules.

This is a very effective method of not locking yourself out. Everybody else, not so much.

iptables -I INPUT -s <your IP> -j ACCEPT

You need to put this as the first rule for it to work properly. Remember, -I inserts it as the first rule; -A appends it to the end of the list.

Tip #6: Know and understand all the rules in your current policy.

Not making a mistake in the first place is half the battle. If you understand the inner workings behind your iptables policy, it will make your life easier. Draw a flowchart if you must. Also remember: What the policy does and what it is supposed to do can be two different things.

Set up a workstation firewall policy

Scenario: You want to set up a workstation with a restrictive firewall policy.

Tip #1: Set the default policy as DROP.

# Set a default policy of DROP
*filter
:INPUT DROP [0:0]
:FORWARD DROP [0:0]
:OUTPUT DROP [0:0]

Tip #2: Allow users the minimum amount of services needed to get their work done.

The iptables rules need to allow the workstation to get an IP address, netmask, and other important information via DHCP (-p udp –dport 67:68 –sport 67:68). For remote management, the rules need to allow inbound SSH (–dport 22), outbound mail (–dport 25), DNS (–dport 53), outbound ping (-p icmp), Network Time Protocol (–dport 123 –sport 123), and outbound HTTP (–dport 80) and HTTPS (–dport 443).

# Set a default policy of DROP
*filter
:INPUT DROP [0:0]
:FORWARD DROP [0:0]
:OUTPUT DROP [0:0]

# Accept any related or established connections
-I INPUT  1 -m state –state RELATED,ESTABLISHED -j ACCEPT
-I OUTPUT 1 -m state –state RELATED,ESTABLISHED -j ACCEPT

# Allow all traffic on the loopback interface
-A INPUT -i lo -j ACCEPT
-A OUTPUT -o lo -j ACCEPT

# Allow outbound DHCP request
-A OUTPUT –o eth0 -p udp –dport 67:68 –sport 67:68 -j ACCEPT

# Allow inbound SSH
-A INPUT -i eth0 -p tcp -m tcp –dport 22 -m state –state NEW  -j ACCEPT

# Allow outbound email
-A OUTPUT -i eth0 -p tcp -m tcp –dport 25 -m state –state NEW  -j ACCEPT

# Outbound DNS lookups
-A OUTPUT -o eth0 -p udp -m udp –dport 53 -j ACCEPT

# Outbound PING requests
-A OUTPUT –o eth0 -p icmp -j ACCEPT

# Outbound Network Time Protocol (NTP) requests
-A OUTPUT –o eth0 -p udp –dport 123 –sport 123 -j ACCEPT

# Outbound HTTP
-A OUTPUT -o eth0 -p tcp -m tcp –dport 80 -m state –state NEW -j ACCEPT
-A OUTPUT -o eth0 -p tcp -m tcp –dport 443 -m state –state NEW -j ACCEPT

COMMIT

Restrict an IP address range

Scenario: The CEO of your company thinks the employees are spending too much time on Facebook and not getting any work done. The CEO tells the CIO to do something about the employees wasting time on Facebook. The CIO tells the CISO to do something about employees wasting time on Facebook. Eventually, you are told the employees are wasting too much time on Facebook, and you have to do something about it. You decide to block all access to Facebook. First, find out Facebook’s IP address by using the host and whois commands.

host -t a www.facebook.com
www.facebook.com is an alias for star.c10r.facebook.com.
star.c10r.facebook.com has address 31.13.65.17
whois 31.13.65.17 | grep inetnum
inetnum:        31.13.64.0 – 31.13.127.255

Then convert that range to CIDR notation by using the CIDR to IPv4 Conversionpage. You get 31.13.64.0/18. To prevent outgoing access to www.facebook.com, enter:

iptables -A OUTPUT -p tcp -i eth0 –o eth1 –d 31.13.64.0/18 -j DROP

Regulate by time

Scenario: The backlash from the company’s employees over denying access to Facebook access causes the CEO to relent a little (that and his administrative assistant’s reminding him that she keeps HIS Facebook page up-to-date). The CEO decides to allow access to Facebook.com only at lunchtime (12PM to 1PM). Assuming the default policy is DROP, use iptables’ time features to open up access.

iptables –A OUTPUT -p tcp -m multiport –dport http,https -i eth0 -o eth1 -m time –timestart 12:00 –timestart 12:00 –timestop 13:00 –d
31.13.64.0/18  -j ACCEPT

This command sets the policy to allow (-j ACCEPT) http and https (-m multiport –dport http,https) between noon (–timestart 12:00) and 13PM (–timestop 13:00) to Facebook.com (–d 31.13.64.0/18).

Regulate by time—Take 2

Scenario: During planned downtime for system maintenance, you need to deny all TCP and UDP traffic between the hours of 2AM and 3AM so maintenance tasks won’t be disrupted by incoming traffic. This will take two iptables rules:

iptables -A INPUT -p tcp -m time –timestart 02:00 –timestop 03:00 -j DROP
iptables -A INPUT -p udp -m time –timestart 02:00 –timestop 03:00 -j DROP

With these rules, TCP and UDP traffic (-p tcp and -p udp ) are denied (-j DROP) between the hours of 2AM (–timestart 02:00) and 3AM (–timestop 03:00) on input (-A INPUT).

Limit connections with iptables

Scenario: Your internet-connected web servers are under attack by bad actors from around the world attempting to DoS (Denial of Service) them. To mitigate these attacks, you restrict the number of connections a single IP address can have to your web server:

iptables –A INPUT –p tcp –syn -m multiport -–dport http,https –m connlimit -–connlimit-above 20 –j REJECT -–reject-with-tcp-reset

Let’s look at what this rule does. If a host makes more than 20 (-–connlimit-above 20) new connections (–p tcp –syn) in a minute to the web servers (-–dport http,https), reject the new connection (–j REJECT) and tell the connecting host you are rejecting the connection (-–reject-with-tcp-reset).

Monitor iptables rules

Scenario: Since iptables operates on a “first match wins” basis as packets traverse the rules in a chain, frequently matched rules should be near the top of the policy and less frequently matched rules should be near the bottom. How do you know which rules are traversed the most or the least so they can be ordered nearer the top or the bottom?

Tip #1: See how many times each rule has been hit.

Use this command:

iptables -L -v -n –line-numbers

The command will list all the rules in the chain (-L). Since no chain was specified, all the chains will be listed with verbose output (-v) showing packet and byte counters in numeric format (-n) with line numbers at the beginning of each rule corresponding to that rule’s position in the chain.

Using the packet and bytes counts, you can order the most frequently traversed rules to the top and the least frequently traversed rules towards the bottom.

Tip #2: Remove unnecessary rules.

Which rules aren’t getting any matches at all? These would be good candidates for removal from the policy. You can find that out with this command:

iptables -nvL | grep -v "0     0"

Note: that’s not a tab between the zeros; there are five spaces between the zeros.

Tip #3: Monitor what’s going on.

You would like to monitor what’s going on with iptables in real time, like with top. Use this command to monitor the activity of iptables activity dynamically and show only the rules that are actively being traversed:

watch --interval=5 'iptables -nvL | grep -v "0     0"'

watch runs ‘iptables -nvL | grep -v “0     0″‘ every five seconds and displays the first screen of its output. This allows you to watch the packet and byte counts change over time.

Report on iptables

Scenario: Your manager thinks this iptables firewall stuff is just great, but a daily activity report would be even better. Sometimes it’s more important to write a report than to do the work.

Use the packet filter/firewall/IDS log analyzer FWLogwatch to create reports based on the iptables firewall logs. FWLogwatch supports many log formats and offers many analysis options. It generates daily and monthly summaries of the log files, allowing the security administrator to free up substantial time, maintain better control over network security, and reduce unnoticed attacks.

Here is sample output from FWLogwatch:

More than just ACCEPT and DROP

We’ve covered many facets of iptables, all the way from making sure you don’t lock yourself out when working with iptables to monitoring iptables to visualizing the activity of an iptables firewall. These will get you started down the path to realizing even more iptables tips and tricks.

How to Create SSH Tunneling or Port Forwarding in Linux

Infiniband Switch upgrades


To
From
1.0.x
1.1.x
1.3.x
2.0.x
2.1.2 – 2.1.6
2.1.7 – 2.1.9
1.0.x
Upgrade or Downgrade
1.1.x
Upgrade or Downgrade
1.3.x
Upgrade or Downgrade
  • Upgrade
  • Downgrade to 2.1.6 first
2.0.x
Upgrade or Downgrade
  • Upgrade
  • Downgrade to 2.1.6 first
2.1.2 – 2.1.6
Upgrade or Downgrade
  • Upgrade
  • Downgrade to 2.1.6 first
2.1.7 – 2.1.9
  • Upgrade
  • Downgrade to 2.1.6 first
  • Upgrade
  • Downgrade to 2.1.6 first
  • Upgrade
  • Downgrade to 2.1.6 first
Upgrade or Downgrade

For example, upgrading from firmware version 1.1.2 to 1.3.5 is supported. However, upgrading from firmware version 1.1.2 to 2.1.5 is not. You must first upgrade from firmware version 1.1.2 to 1.3.x, and from firmware version 1.3.x to 2.1.5.

Similarly, downgrading from firmware version 2.1.6 to 2.0.7 is supported. However, downgrading from firmware version 2.1.9 to 2.0.7 is not. You must first downgrade from firmware version 2.1.9 to 2.1.6 using the downgrade version of firmware 2.1.6. Then you can downgrade from 2.1.6 to 2.0.7.


Note –  See Firmware Update Guidelines about upgrading and downgrading firmware.

Upgrade the Switch Firmware (CLI)


Note –  Before upgrading or downgrading the switch firmware, read Firmware Update Guidelines.


Note –  If you are going to downgrade the firmware to a version earlier than 2.1, you must disable secret M_Keys. Refer to the Sun Datacenter InfiniBand Switch 36 Administration Guide for Firmware Version 2.1 for instructions on disabling secret M_Key functionality.


Note –  If you are going to downgrade the firmware to a version earlier than 2.0, you must remove user partitions and depopulate the Subnet Manager nodes list. Refer to the Sun Datacenter InfiniBand Switch 36 Administration Guide for Firmware Version 2.1 for instructions on removing partitions for a firmware downgrade.


    1. Consider your first step:
      • If you are upgrading or downgrading from firmware version 2.0 or newer, go to Step 2.
      • If you are upgrading or downgrading from a firmware version earlier than 2.0, go to Step 5.

    1. Open an SSH session as user ilom-admin and connect to the management controller by specifying the controller’s host name.For example:
      % ssh -l ilom-admin switch_name
      ilom-admin@switch_name's password: password
      ->

      where switch_name is the host name of the management controller. Initially, the password is ilom-admin.

    1. If the Subnet Manager is running on the management controller, disable the Subnet Manager.
      -> show /SYS/Fabric_Mgmt
      NOTE: show on Fabric_Mgmt will launch a restricted Linux shell.
           User can execute switch diagnosis, SM Configuration and IB
           monitoring commands in the shell. To view the list of commands,
           use "help" at rsh prompt.
      
           Use exit command at rsh prompt to revert back to
           ILOM shell.
      
      FabMan@switch_name->disablesm
      Stopping partitiond-daemon.                                [  OK  ]
      Stopping IB Subnet Manager..                               [  OK  ]
      FabMan@switch_name->exit
      exit
      ->

    1. Go to Step 11.

    1. Open an SSH session as user root and connect to the management controller by specifying the controller’s host name.
      % ssh -l root switch_name
      root@switch_name's password: password
      #

      where switch_name is the host name of the management controller. Initially, the password is changeme.

    1. If the Subnet Manager is running on the management controller, disable the Subnet Manager.
      # disablesm
      Stopping partitiond daemon.                                [  OK  ]
      Stopping IB Subnet Manager..                               [  OK  ]
      #

    1. Verify that there is at least 80 MB available in the / filesystem.
      # df -h /
      Filesystem            Size   Used   Avail  Use%  Mounted on
      /dev/hda2             471M   276M   172M   62%   /
      #

      In this example, there are 172 MB available. If not enough space is available, you must delete or move files from the / filesystem.

    1. Verify that there is at least 120 MB available in the /tmp directory.
      # df -h /tmp
      Filesystem            Size   Used  Avail  Use%  Mounted on
      tmpfs                 250M   240K  249M   1%    /tmp
      #

      In this example, there are 249 MB available. If not enough space is available, you must delete files from the /tmp directory.

    1. Verify that there is at least 120 MB free memory available.
      # free -m
                               total      used       free     shared    buffers    cached
      Mem:                     498        104        393      0         12         47
      -/+ buffers/cache:       45         453
      Swap:                    0          0          0
      #

      In the -/+ buffers/cache: row of the free column, there should be at least 120 MB free memory. In this example, there are 453 MB available. If not enough memory is available, you must exit nonessential applications that are running.

    1. Start the Oracle ILOM shell.
      # spsh
      Oracle(R) Integrated Lights Out Manager
      Version ILOM 3.0 r47111
      Copyright (c) 2010, Oracle and/or its affiliates. All rights reserved.
      ->

      You are now in the Oracle ILOM shell.

      You can use the exit command to return to the Linux shell.

    1. Begin the upgrade process.
      -> load -source URI/pkgname

      where:

      • URI is the uniform resource indicator for the host where the switch firmware package is located. The FTP and HTTP protocols are supported. If you are upgrading from firmware 2.1.2-2 or newer, the TFTP protocol is also supported.
      • pkgname is the name of the firmware package in the transfer directory.

      For example, using the HTTP protocol:

      -> load -source http://123.45.67.89/tmp/sundcs_36p_repository_2.1.9_1.pkg
      Downloading firmware image. This will take a few minutes.

      Note –  If you are experiencing version number contention, you can use the –force option to disable version number checking, and force the upgrade.


      The firmware is downloaded. The upgrade begins. A caution is displayed and you are asked to commit to the upgrade.

      NOTE: Firmware upgrade will upgrade the SUN DCS 36p firmware. ILOM will enter a special mode to load
      new firmware. No other tasks should be performed in ILOM until the firmware upgrade is complete.
      
      Subnet manager is running on the switch. Proceeding with installation will stop it.
      Are you sure you want to load the specified file (y/n)?

    1. Answer y to the prompt to commit to the upgrade.The upgrade begins.
      Setting up environment for firmware upgrade. This will take few minutes.
      Subnet manager has been temporarily disabled on this switch so that firmware upgrade can go on. After the
      upgrade is done, please make sure that the SM is running again, using commands sminfo and enablesm.
      Starting SUN DCS 36p FW update
      ========================== 
      Performing operation: I4 A 
      ========================== 
      I4 A: I4 is already at the given version. 
      =========================== 
      Summary of Firmware update 
      =========================== 
      I4 status                :  FW UPDATE - SUCCESS 
      I4 update succeeded on   :  none 
      I4 already up-to-date on :  A 
      I4 update failed on      :  none 
      ========================================= 
      Performing operation: SUN DCS 36p firmware update 
      ========================================= 
      SUN DCS 36p fw upgrade from 2.1.6-2 to 2.1.9-1: 
      Upgrade started... 
      Upgrade completed. 
      INFO: SUN DCS 36p fw upgrade from 2.1.6-2 to 2.1.9-1 succeeded 
       
      Post-install checks started... 
      Post-install checks completed. 
      Firmware update is complete. 
      ILOM will be restarted and will take 2 minutes to come up. 
      You will need to reconnect to Integrated Lights Out Manager. 
       
      Stopping any already executing ILOM daemons 
      Starting event manager 
      Starting log manager 
      Starting ILOM IPMI stack 
      Started ILOM IPMI stack 
      Starting lumain 
      Starting luproxy 
      Starting ealertd 
      Starting web server 
      Starting SNMP 
      Terminated 
      #

    1. Exit the Oracle ILOM CLI shell.
      -> exit
      exit
      #

    1. Restart the switch to enable the new firmware.
      -> reset /SP
      Are you sure you want to reset /SP (y/n)? y
      Performing reset on /SP
      Broadcast message from root (Thu Mar 16 14:00:34 2017):
      The system is going down for reboot NOW! 
      -> Connection to switch_name closed by remote host.
      Connection to switch_name closed.

      Note –  The restart process takes between 4 to 5 minutes to complete. The Oracle ILOM stack requires at least 2 minutes to become operational after a reboot.


    1. If the Subnet Manager was previously disabled, log in as the root user and enable the Subnet Manager.
      % ssh -l root switch_name
      root@switch_name's password: password
      # enablesm
      Starting IB Subnet Manager.                                [  OK  ]
      Starting partitiond daemon.                                [  OK  ]
      #

    1. Verify the firmware version.
      # version
      SUN DCS 36p version: 2.1.9-1 
      Build time: Jan 12 2017 09:16:51
      SP board info:
      Manufacturing Date: 2013.08.13 
      Serial Number: "NCDA00732" 
      Hardware Revision: 0x0007 
      Firmware Revision: 0x0102
      BIOS version: SUN0R100 
      BIOS date: 06/22/2010#

      In the first line of the output is SUN DCS 36p version x.y.z-w, where x.y.zw is the version of the firmware upgraded (or downgraded). For example, 2.1.9-1.

  1. Verify the firmware integrity.
    # fwverify
    Checking all present packages:
    ........................................................................... OK
    Checking if any packages are missing:
    ........................................................................... OK
    Verifying installed files:
    ........................................................................... OK
    Checking FW Coreswitch:
     FW Version: 7.4.3002 OK 
     PSID: SUN_NM2-36p_004 OK 
     Verifying image integrity OK#