In this guide, we will learn what is fstab in Linux, and what is the usage of fstab file, the structure of /etc/fstab file and finally how to debug fstab issues. At the end, we will also discuss a brief introduction to mtab file, its usage and how mtab differs from fstab.
What is fstab?
As a server administrator or Linux desktop user or anyone who is new to Linux, understanding about /etc/fstab file in Linux and how to debug fstab issues are very important.
Fstab is a file system table used by the kernel during boot time to mount the file system. To put it in simple terms, you will create one or more partitions on your hard drive and you will make an entry for each partition in fstab which will be read by the kernel during boot time and the file system will be automatically mounted.
By default, any partitions you create during the OS installation will be automatically added to the fstab file. Let’s dive in and see how fstab is structured and how to use fstab.
NOTE : Before editing the fstab file, it is best practice to take a backup of the file. If in case something is messed up you can revert the backup copy.
Structure of /etc/fstab file
Fstab is located in the /etc/ directory and owned by the root user. So you should edit the file using sudo privilege or as the root user.
Display the fstab file by running the following command to understand its structure.
$ cat /etc/fstab
$ cat /etc/fstab | grep -i -v "^#" | column -t # Skip comments and format
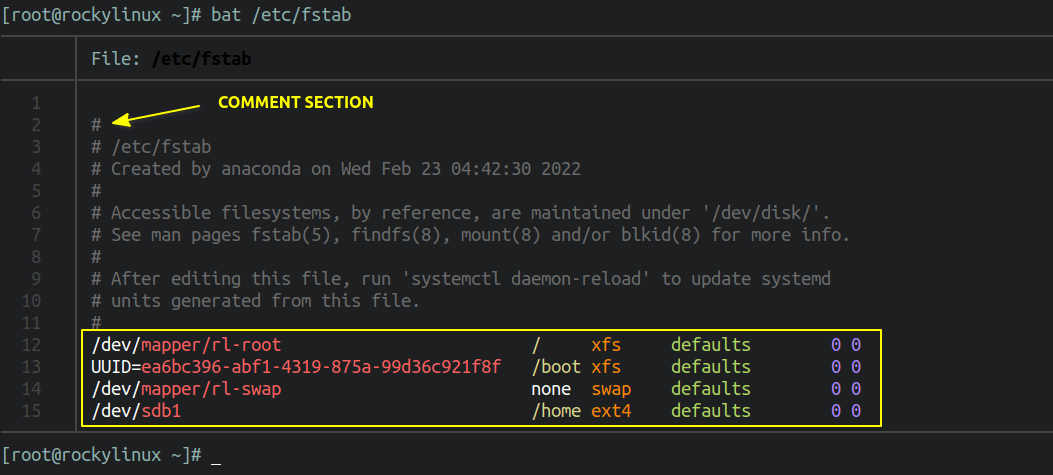 Contents of fstab file
Fstab file consists of six columns (sections).
- File system – Block device which is partitioned and created a file system on it.
- Mount Point – Where the file system is mounted in your system.
- Type – File system type (Ext4, Ext3, swap, Xfs, etc.)
- Options – This decides what mount parameters to be considered when mounting the file system
- Dump – This is for the backup purposes used by the
dump utility. Setting it to zero means disabling the backup and one means enabling the backup to a given device/medium.
- Pass – File system check at boot time by the
fsck utility. Zero will disable the file system check and for the root file system it should be set to 1 and for other partitions, it should be set to 2.
Each filesystem is described on a separate line. Fields on each line are separated by tabs or spaces.
Let’s see about these six parameters in detail.
1. File System
In the first column of fstab, you need to point to which partition you are going to mount. Either you can use a block device name like /dev/sda* or use the UUID.
When you create a file system on top of any partitioned drive using the mkfs command there will be a UUID created for that particular partition.
Let’s say you created a new partition and it is sdb1. In this case, your fstab will be as follows.
/dev/sdb1 /home ext4 defaults 0 0
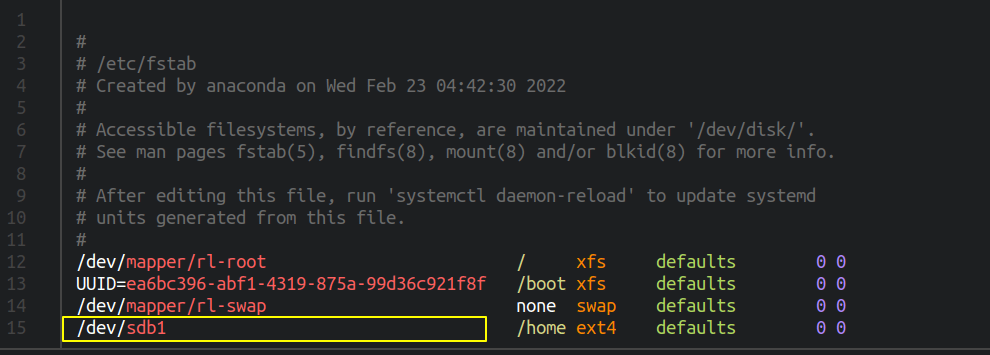 Mount using names
To get the block id for any file system run the following command.
$ blkid                # Print info about all fs.
$ blkid /dev/sdb1      # Print info about given fs alone.
Now using this block id you can mount the file system as shown in the below image.
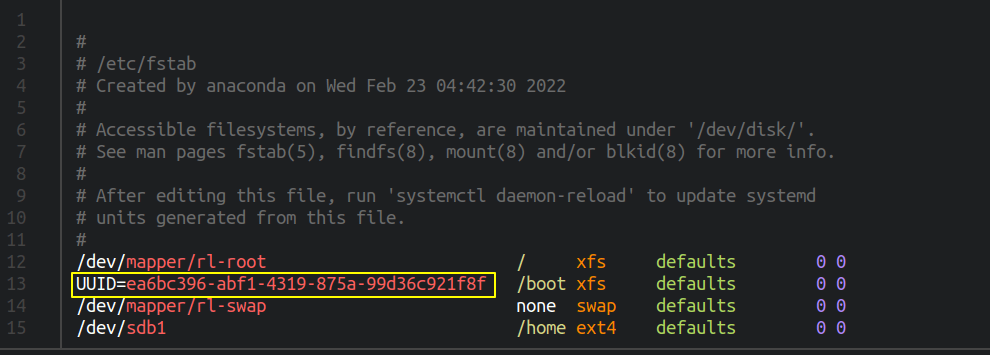 Mount using UUID
2. Mount Point
In the second column, you have to specify the mount point directory. Mount point refers to the directory in the file system where your partitioned drive will be mounted.
As you see in the below image, each partition is mounted under a different directory. For example, the partition /dev/sdb1 is dedicated to the home directory and mounted under /home.
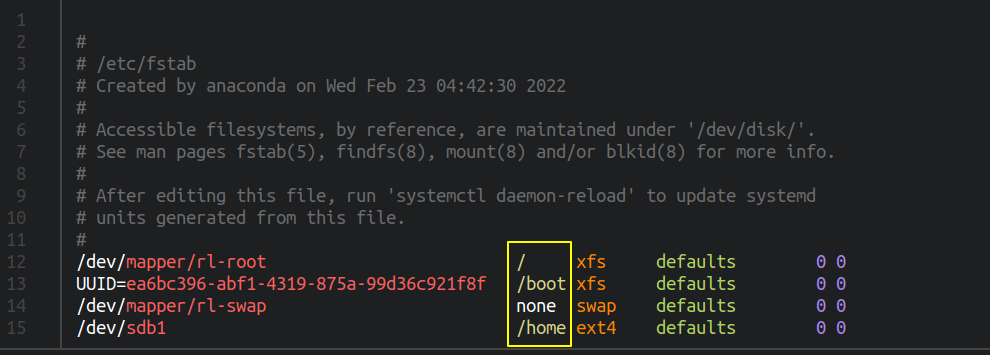 Mount point
Let’s say you created a new partition with 100GB size and with EXT4 as partition type. The fstab entry will be as follows. Here /mnt/data1 is the mount point.
UUID=xxxx-xxx-xxx /mnt/data1/ ext4 defaults 0 0
Or
/dev/sdb2 /mnt/data1/ ext4 defaults 0 0
3. Filesystem Type
Here you will mention the file system type(EXT2, EXT3, EXT4, XFS, VFAT, SWAP, etc.). If you want to know the file system type for a block device, use blkid or lsblk command.
$ lsblk -f /dev/sdb1
NAME FSTYPE LABEL UUID                                 MOUNTPOINT
sdb1 ext4         365c64d7-4d65-4cdf-8ce1-0def8bb41997 /home
$ blkid /dev/sdb1
/dev/sdb1: UUID="365c64d7-4d65-4cdf-8ce1-0def8bb41997" BLOCK_SIZE="4096" TYPE="ext4" PARTUUID="8f174339-01"
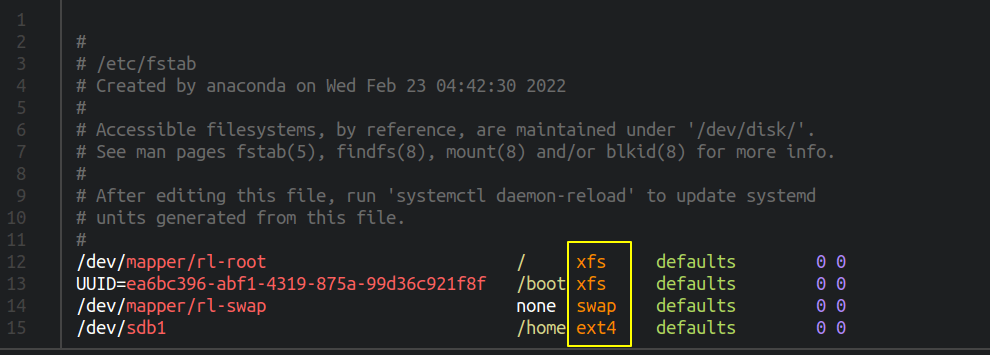 Filesystem type
4. Mount Options
This is an important column where you will pass mount options for the file system. There are a lot of mount options that can be used. For normal usage using the default option is enough. The option default points to the combination of seven (rw, suid, dev, exec, auto, nouser, and async) options.
Let’s see what the default option does.
rw – This tells the file system to be mounted in read-write mode. When an error occurs you can make the file system to be mounted in read-only mode by using the option errors=remount-ro.suid – Any operation related to suid and sgid will be allowed through this option.dev – It will interpret character and block devices on the file system. If you do not wish to interpret characters and block devices you can use nodev option explicitly.exec – From the file system you can execute the binaries by setting the exec option. Opposite to this, you can use the noexec option to not execute binaries from the file system.auto – This option is responsible for auto mounting the file system during the boot time or whenever you run the mount -a command from the terminal. Opposite to this, there is noauto option that will only allow to mount the file system individually.nouser – Only a superuser can mount the file system. You can also use “user” and “users” options which can set the ordinary user to mount and unmount the file system.async – All the IO operations should be done asynchronously. If you use the option “sync” the IO operation will be done synchronously.
Depending upon the requirement you may need to use different options. If you have any existing production server in your environment, I suggest you take a look at the fstab file which will give you a good idea about what are the mount options used.
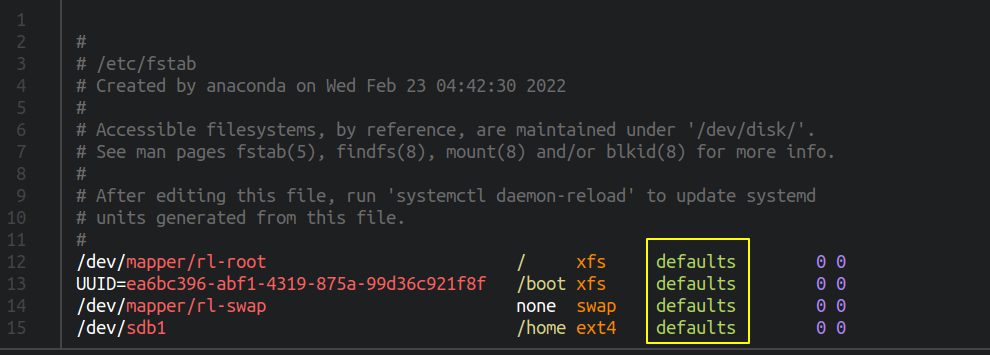 Mount options
5. Dump
This column is specific for backup purposes. When it is set to 1, the dump utility will take backups. This is an obsolete feature now as it was originally designed to take backups in tapes for older file systems.
It is recommended to set it to zero.
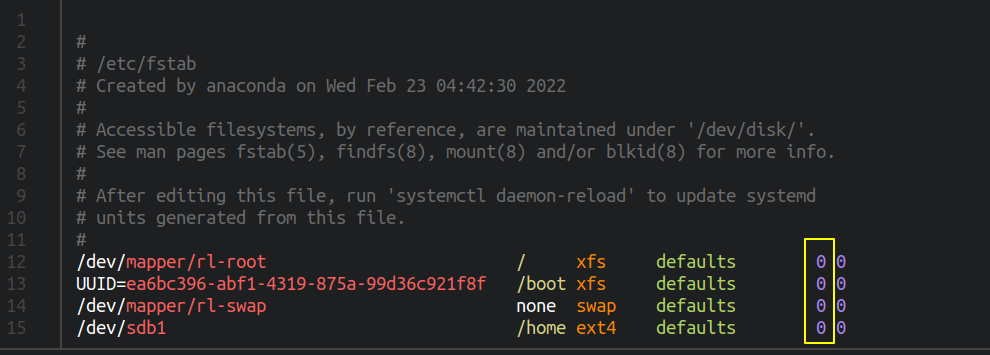 Dump column in fstab
6. Pass
During boot time the fsck utility will do a file system check based on the value we provide in the sixth column. If you set the value to zero or leave it empty, the file system check will be disabled.
The root file system should always be specified to the value 1. For other file systems, you can set the value to 2. Since I am using VM for the demonstration, I have set all the values to zero.
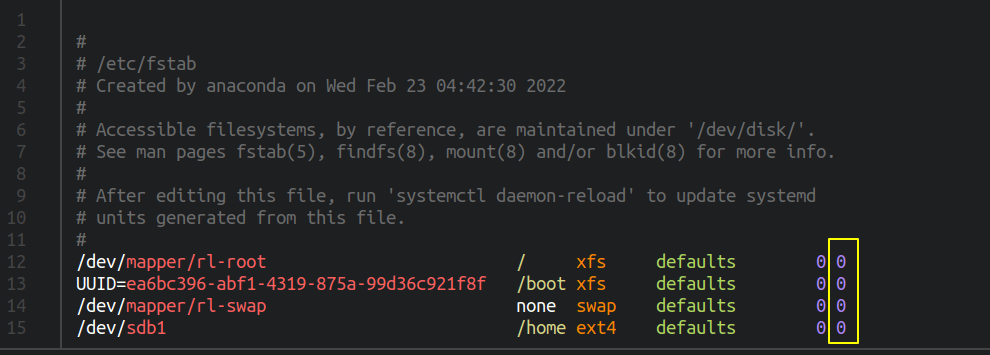 Pass column in fstab
If you made any mistake in the fstab file and when you reboot the machine it will go into emergency mode. In emergency mode, there will be no network interface so you have to debug directly in the console.
 Boot into Emergency mode
You have to type the root password to enter into the emergency mode. Run the following command and scroll slowly to see for error messages. In my case, I intentionally removed the separator (/) in /dev/sdb1.
 Fix Boot problems related to Fstab file
In emergency mode, if the file system is mounted in read-only mode then you have to mount in rw mode and edit the fstab file to fix the problem. To remount the file system in rw mode run the following command.
$ mount -o rw,remount /
Now edit the fstab to fix the error and reboot the machine. Now your machine should be able to boot properly.
$ reboot
To avoid the issues during boot time, you can run the mount command after adding the fstab entries.
Take a look at the below image where I have added a new entry for /dev/sdb2. I have not specified the file system type so it will throw me an error when I run the mount command.
 Filesystem type error
$ mount -a
mount: /mnt: unknown filesystem type 'defaults'.
What is a Mtab File?
When you run the mount command without passing any arguments it prints the list of mounted file systems.
$ mount
There is also a file called mtab in the /etc/ directory. When you look at /etc/mtab, it will be exactly the same as the output of the mount command.
Let’s see what the man page has to say about the mtab file.
 What is mtab file
The /etc/mtab file is symlinked to mounts in the proc file system. If you run the mount or umount command the result will be updated in mounts.
$ ls -ln /etc/mtab
lrwxrwxrwx 1 0 0 19 Jan 9 17:45 /etc/mtab -> ../proc/self/mounts
To summarize the difference between fstab and mtab, fstab is used to mount the file system during the boot time and mtab is used to display the list of file systems mounted.
If /etc/mtab file is corrupted or deleted by accident, you can regenerate it by using the following command.
$ sudo sh -c 'grep -v rootfs /proc/mounts > /etc/mtab'
Conclusion
In this article we have discussed what is fstab and mtab and how it is important for the system to store and read the partition information during boot time. We also discussed what happens when there is a mistake made in the fstab file.