Roundcube is a free and open source, fully-featured web-based multilingual IMAP webmail software, with an application-like user interface that is fully functional and customizable, and uses latest web standards. It is built using PHP and offers full functionality you expect from a modern email client.
Roundcube Features:
- It’s multilingual, supports over 70 languages.
- Supports a Find-as-you-type address book.
- Supports multiple sender identities.
- Offers sophisticated privacy protection.
- Has a full featured address book with groups and LDAP connectors.
- Offers richtext/HTML message composing.
- Supports searching messages and contacts.
- Supports Int. domain names (IDNA).
- Supports folder manipulation, shared folders and ACL.
- Extensible using the Plug-in API.
- Provides spell checking functionality.
- Provides import/export functions.
- Has a plug-in API for flexible exensions and so much more.
Recommended System Requirements:
- A CentOS 7 Server or RHEL 7 Server with Minimal Install.
- Apache or Nginx web server
- PHP 5.4 and MySQL/MariaDB database
- SMTP and IMAP server with IMAP4 rev1 support
For the scope of this article, we assume that you already have a running Postfix email server with virtual users, otherwise, follow our guides setup:
- Setting Up Postfix Mail Server and Dovecot with MariaDB – Part 1
- Configure Postfix and Dovecot Virtual Domain Users – Part 2
- Install and Integrate ClamAV and SpamAssassin to Postfix Mail Server – Part 3
Testing Environment:
For the purpose of this article, I will be installing Roundcube Webmail on a Linode CentOS 7 VPS with a Nginx web server, static IP address 192.168.0.100 and hostname mail.tecmint.com.
Step 1: Install Nginx, PHP-FPM and MariaDB in CentOS 7
1. First start by enabling EPEL and REMI repositories and install Nginx, PHP, PHP-FPM and MariaDB server on your CentOS 7 system.
# yum install https://dl.fedoraproject.org/pub/epel/epel-release-latest-7.noarch.rpm
# yum install http://rpms.remirepo.net/enterprise/remi-release-7.rpm
# yum install yum-utils
# yum-config-manager --enable remi-php72
# yum install nginx php php-fpm php-mcrypt php-cli php-gd php-curl php-xml php-mysql php-mbstring php-pspell php-imagick mariadb-server
2. Once you have successfully installed all the packages, start the Nginx web server, enable it to auto-start at boot time and check if its up and running.
# systemctl start nginx
# systemctl enable nginx
# systemctl status nginx
3. Next, if you have a system firewall enabled, you need to open port 80 for external requests.
# firewall-cmd --permanent --add-port=80/tcp
# firewall-cmd --reload
4. Next, you need to configure PHP-FPM to work properly. Open the file /etc/php.ini using a command line test editor.
# vim /etc/php.ini
Look for the directive ;cgi.fix_pathinfo=1, uncomment it and set its value to 0.
cgi.fix_pathinfo=0
Also uncomment the directive ;date.timezone and set its value to your timezone.
date.timezone = "Africa/Kampala"
Once you are done, save the file and exit.
5. Then start PHP-FPM service, enable it to auto-start at boot time and check if its up and running, as follows.
# systemctl start php-fpm
# systemctl enable php-fpm
# systemctl status php-fpm
Step 2: Secure MariaDB Server and Create Roundecube Database
6. Now start the MariaDB service using the following commands.
# systemctl start mariadb
# systemctl enable mariadb
# systemctl status mariadb
7. The default MariaDB installation is unsecure. You need to run the security script which comes with the binary package, to secure it. You will be asked to set a root password, remove anonymous users, disable root login remotely and remove test database.
# mysql_secure_installation
8. Now login to the MariaDB database, create a database for Roundecube and grant the user to appropriate permissions on the database (remember to set a strong/secure password in a production environment).
# mysql -u root -p
MariaDB [(none)]> CREATE DATABASE roundcubemail /*!40101 CHARACTER SET utf8 COLLATE utf8_general_ci */;
MariaDB [(none)]> CREATE USER 'roundcube'@'localhost' IDENTIFIED BY '=213@!#webL';
MariaDB [(none)]> GRANT ALL PRIVILEGES ON roundcubemail.* TO 'roundcube'@'localhost';
MariaDB [(none)]> FLUSH PRIVILEGES;
MariaDB [(none)]> exit
9. Next, import the roundcube table layout to the newly created database.
# cd /var/www/html/roundcubemail/
# mysql -u root -p roundcubemail < SQL/mysql.initial.sql
Step 3: Download Roundcube Package
10. In this step, download the latest stable version (1.3.7 at the time of this writing) of Roundcube from the download page or use wget command-line downloader to get it, extarct the TAR file, and upload the files into your web server document root.
# wget -c https://github.com/roundcube/roundcubemail/releases/download/1.3.7/roundcubemail-1.3.7-complete.tar.gz
# tar xzf roundcubemail-1.3.7-complete.tar.gz
# mv roundcubemail-1.3.7 /var/www/html/roundcubemail
11. Next, set the appropriate permissions on the roundcube web root files.
# chown -R nginx:nginx /var/www/html/roundcubemail
Step 4: Configure Nginx Server Block For Roundcube Web Installer
12. Now create an Nginx server block for the roundcube under /etc/nginx/conf.d/ (you can name the file the way you want but it should have a .conf extension).
# vim /etc/nginx/conf.d/mail.example.com.conf
Add the following configuration in the file.
server {
listen 80;
server_name mail.example.com;
root /var/www/html/roundcubemail;
index  index.php index.html;
#i# Logging
access_log /var/log/nginx/mail.example.com_access_log;
error_log   /var/log/nginx/mail.example.com_error_log;
location / {
try_files $uri $uri/ /index.php?q=$uri&$args;
}
location ~ ^/(README.md|INSTALL|LICENSE|CHANGELOG|UPGRADING)$ {
deny all;
}
location ~ ^/(config|temp|logs)/ {
deny all;
}
location ~ /\. {
deny all;
access_log off;
log_not_found off;
}
location ~ \.php$ {
include /etc/nginx/fastcgi_params;
#fastcgi_pass 127.0.0.1:9000;
fastcgi_pass unix:/var/run/php-fpm/php-fpm.sock;
fastcgi_index index.php;
fastcgi_param SCRIPT_FILENAME $document_root$fastcgi_script_name;
}
}
Save the file and close it.
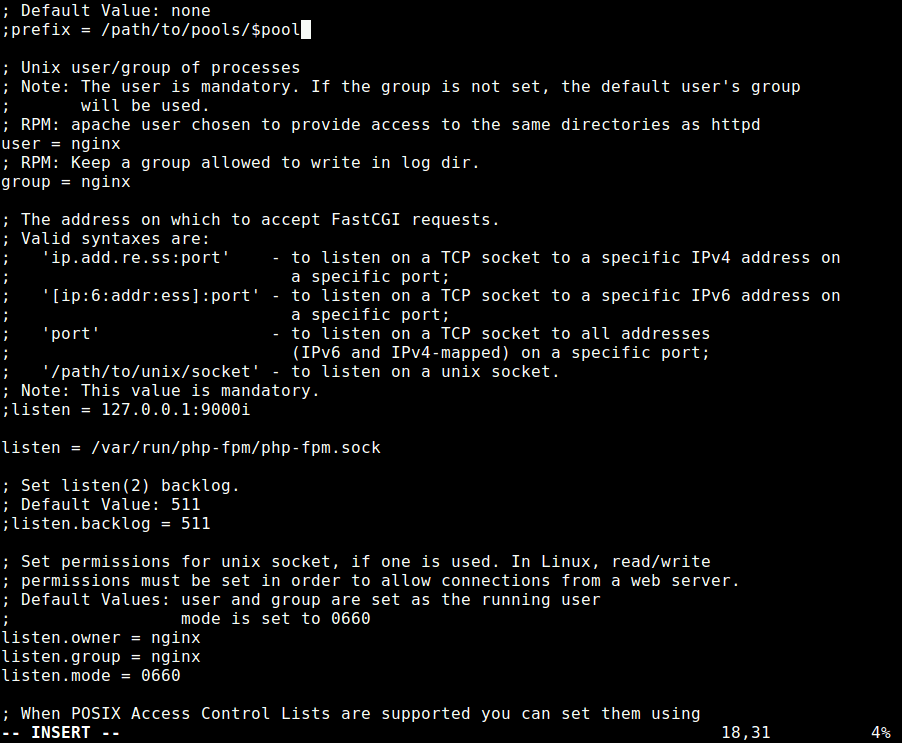
13. Next, open the file /etc/php-fpm.d/www.conf to make a few changes to PHP-FPM web directive.
# vim /etc/php-fpm.d/www.conf
Change the user apache to nginx in the following variables.
user = nginx
group = nginx
Then comment out the line listen = 127.0.0.1:9000 and set the listen variable to listen on a unix socket set in the nginx server block file:
listen = /var/run/php/php-fpm.sock
Also set the permissions for unix socket, uncomment and change the lines to:
listen.owner = nginx
listen.group = nginx
listen.mode = 0660
Configure PHP-FPM
Once you are done, save the file and close it.
14. Then restart the Nginx and PHP-FPM services to apply the recent changes, as follows.
# systemctl restart nginx php-fpm
Step 5: Access Roundcube Web UI
15. Before you start the install wizard, to avoid any sessions errors, set the appropriate permissions on the directory /var/lib/php/session/. The default group owner is apache, change it to nginx as shown.
# ls -ld /var/lib/php/session/
# chown :nginx /var/lib/php/session/
# ls -ld /var/lib/php/session/
16. Now open a browser and use the address http://mail.example.com/installer (replace domain with the server name you set while creating a Nginx server block for roundcube) to access the web installer. If all PHP versions, extensions and php.ini/.htaccess settings are correct, you will see following screenshot, click on Next to go to the configurations page.
http://mail.example.com/installer
OR
http://IP-address/installer
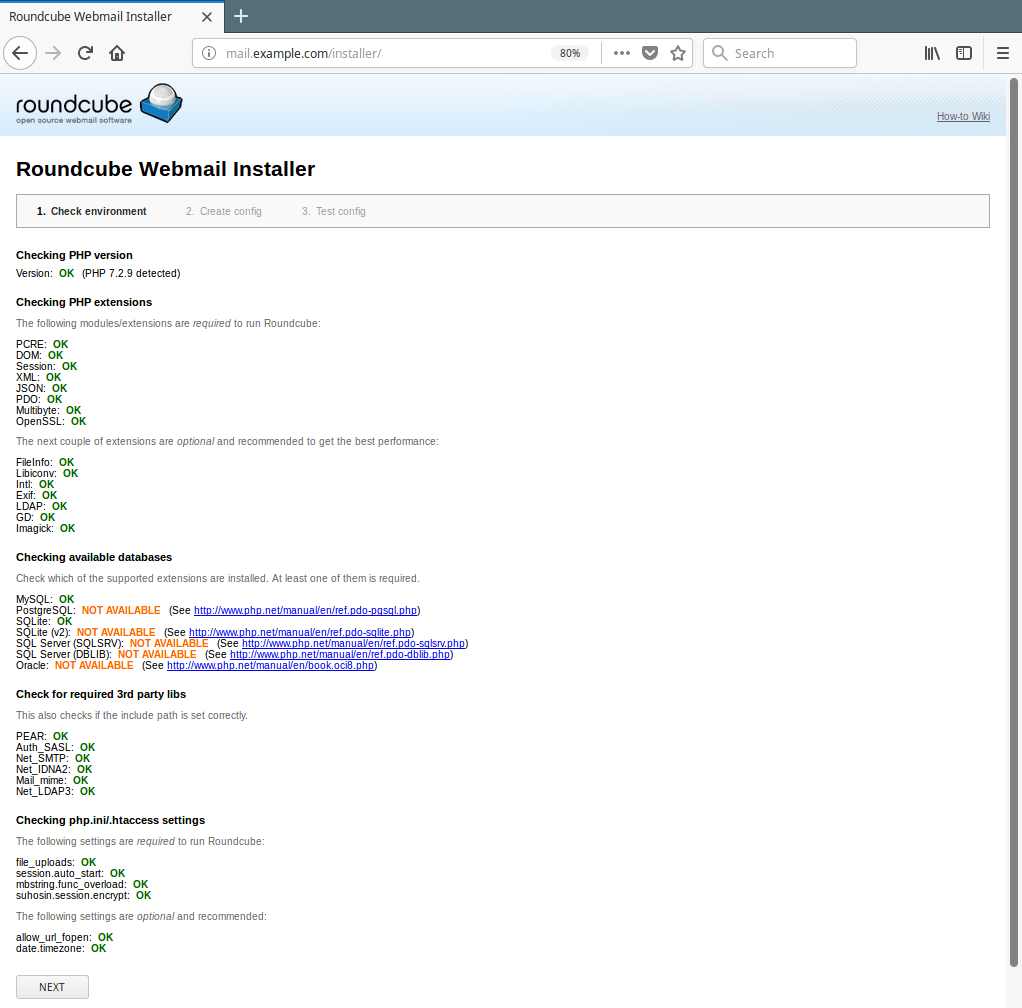
Access Roundcube Webmail Installer
17. The configurations page allows you to setup your roundcube instance. We will only explain the important options for the scope of this guide.
Under the General Configuration, set a product_name for example Example.com Webmail.
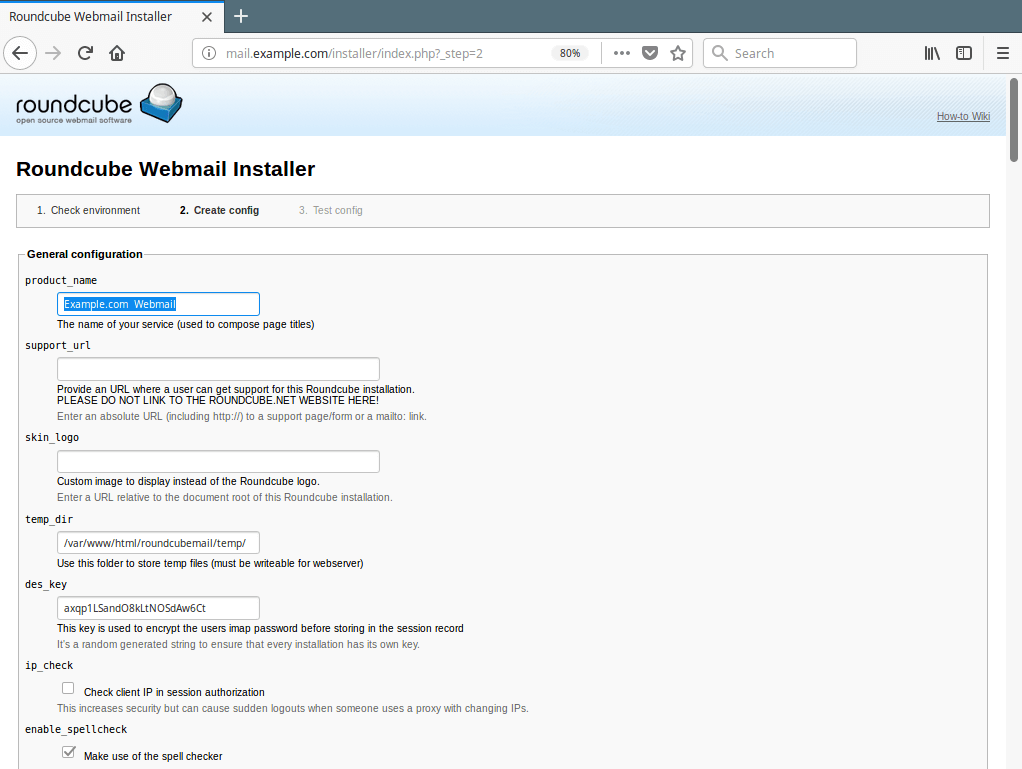
Roundcube Product Name
Go to Database setup, enter the database host, name, user and password to connect to the MySQL server.

Roundcube Database Settings
Then scroll down to IMAP and SMTP settings and enter the IP address of your IMAP and SMTP server, if its same server on which you are running roundcube, leave it as “localhost” and also specify other necessary parameters.
You can specify other settings according to your needs, once you are done, click on Create Config.
18. You should new see a message saying ”The config file was saved successfully into /var/www/html/roundcubemail/config directory of your Roundcube installation.” Click on Continue.
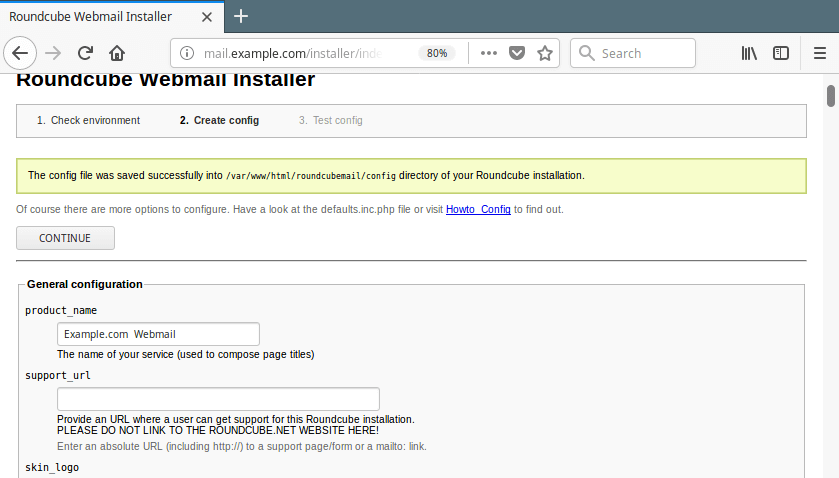
Roundcube Configuration File Created
19. You can review your configuration from the Test config page as shown in the following screenshot.
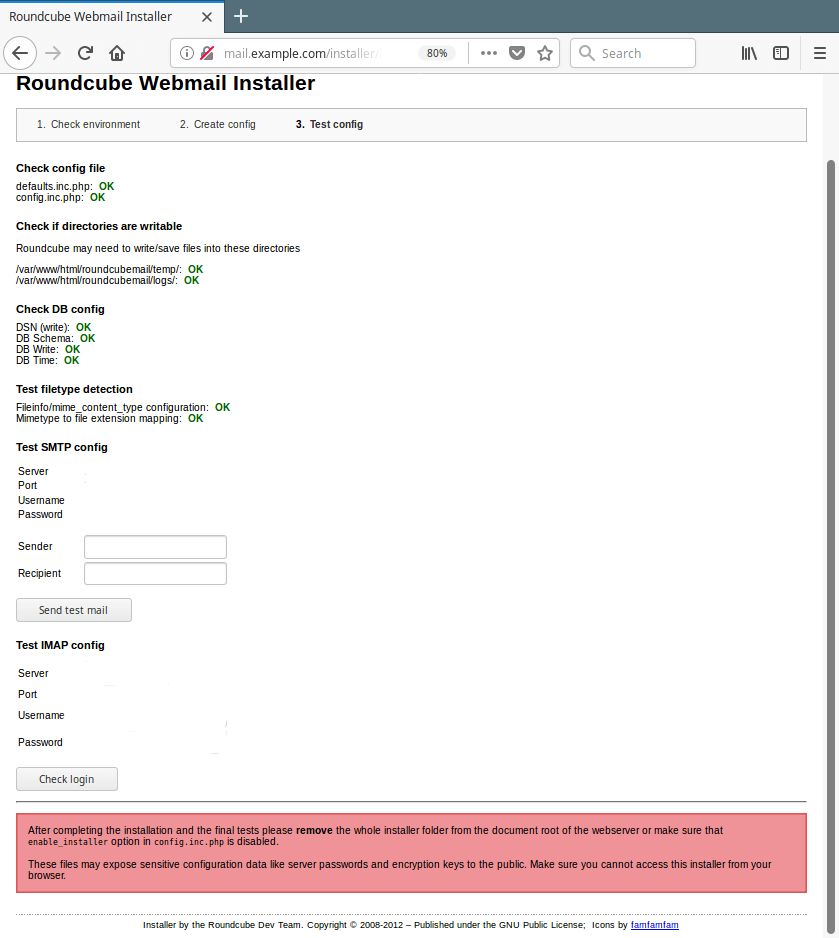
Test Roundcube Configuration
20. Next, remove the whole installer folder (which contains files that may expose sensitive configuration data like server passwords and encryption keys to the public) from the roundcube root directory (or make sure that enable_installer option in config.inc.php is disabled).
# rm -rf /var/www/html/roundcubemail/installer
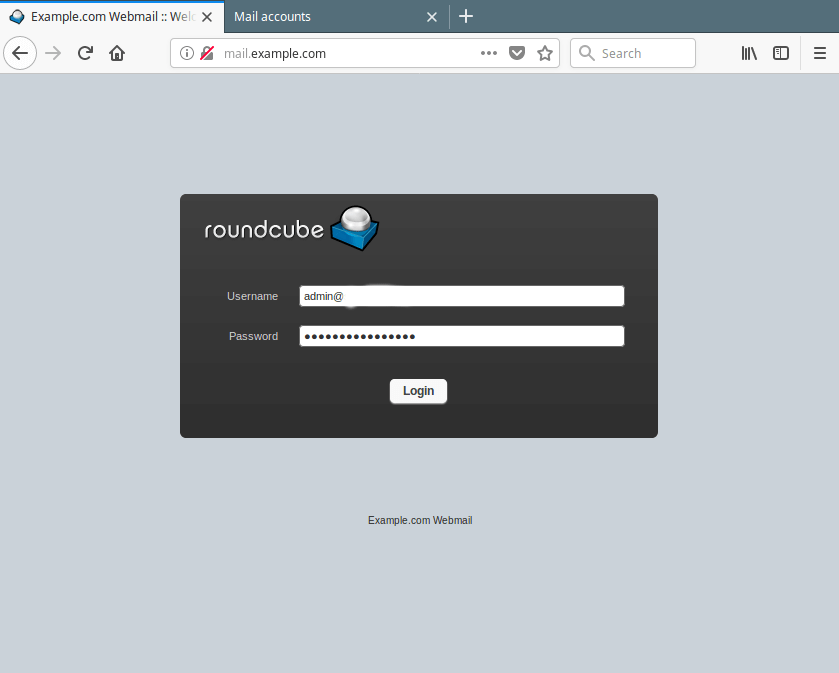
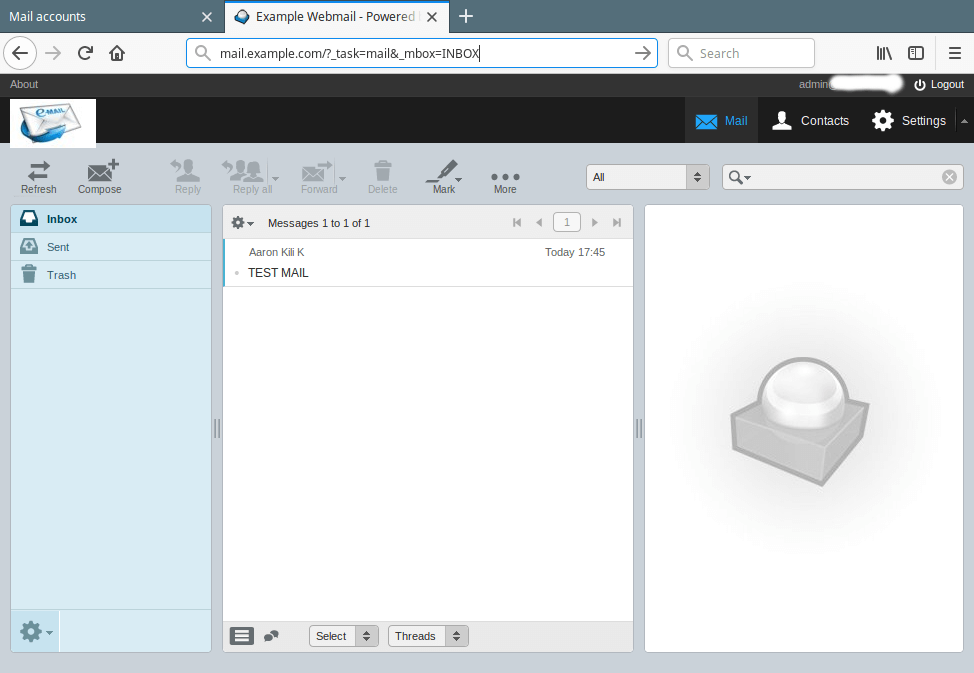
21. Finally, use the URL http://mail.example.com to access the roundcube login page. Enter your user name and password to view your mails.
Roundcube Webmail Login
Roundcube Webmail Access
Summary
Roundcube is a widely used, fully-featured web-based multilingual mail client. In this article, we showed how to install the latest stable version of Roundcube Webmail on a CentOS 7 with Nginx web server. If you have any questions, use the feedback form below to reach us.